
As a busy mom, I know how precious time can be, especially when it comes to whipping up something sweet for the family. That’s where these delightful S’more Bars come in! They capture the nostalgic flavors of classic s’mores, but in a quick and easy bar form. Imagine the gooey marshmallows, rich chocolate, and crunchy graham crackers all packed into one delicious bite. Whether you’re looking to impress your loved ones or simply treat yourself after a long day, these bars are the perfect solution. Trust me, they’ll become a favorite in no time!
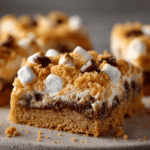
S’more Bars: Discover the Ultimate Dessert Recipe!
- Total Time: 35 minutes
- Yield: 12 bars 1x
- Diet: Vegetarian
Description
S’more Bars are a delicious and easy-to-make dessert that combines the classic flavors of s’mores in a convenient bar form.
Ingredients
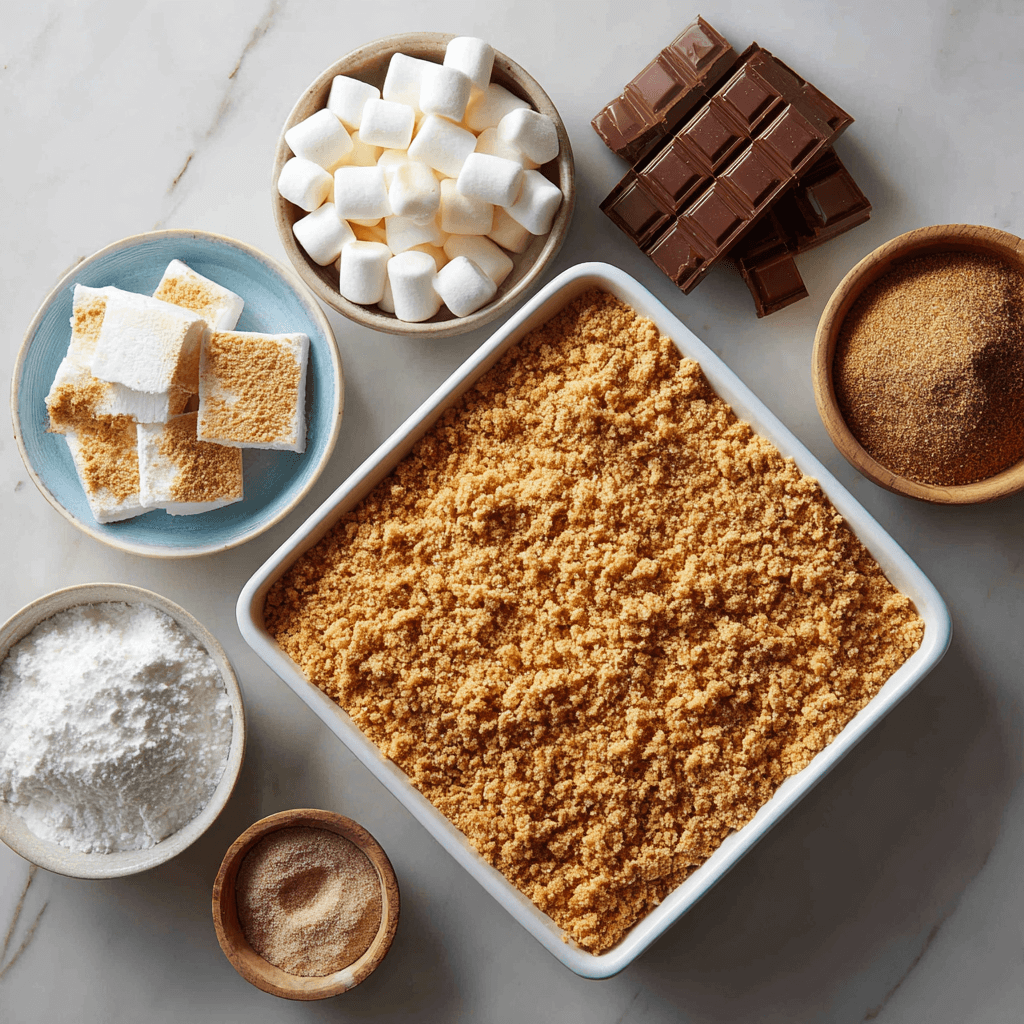
- 1 cup graham cracker crumbs
- 1/2 cup unsalted butter, melted
- 1/2 cup brown sugar
- 1 cup mini marshmallows
- 1 cup chocolate chips
- 1/2 cup sweetened condensed milk
Instructions
- Preheat the oven to 350°F (175°C).
- In a bowl, mix graham cracker crumbs, melted butter, and brown sugar until well combined.
- Press the mixture into the bottom of a greased baking dish.
- Layer mini marshmallows and chocolate chips evenly over the crust.
- Drizzle sweetened condensed milk over the top.
- Bake for 15-20 minutes or until the marshmallows are golden brown.
- Allow to cool before cutting into bars.
Notes
- For a richer flavor, use dark chocolate chips.
- Store leftovers in an airtight container for up to a week.
- Feel free to add nuts or other toppings for extra texture.
- Prep Time: 15 minutes
- Cook Time: 20 minutes
- Category: Dessert
- Method: Baking
- Cuisine: American
Nutrition
- Serving Size: 1 bar
- Calories: 200
- Sugar: 15g
- Sodium: 100mg
- Fat: 10g
- Saturated Fat: 6g
- Unsaturated Fat: 2g
- Trans Fat: 0g
- Carbohydrates: 25g
- Fiber: 1g
- Protein: 2g
- Cholesterol: 20mg
Keywords: S’more Bars, dessert recipe, easy dessert, chocolate bars
Table of Contents
Why You’ll Love This S’more Bars
These S’more Bars are a dream come true for busy lives! They come together in just 35 minutes, making them a quick solution for dessert cravings. The combination of flavors is simply irresistible, with each bite offering a delightful crunch and gooeyness. Plus, they’re perfect for sharing at gatherings or enjoying during a cozy night in. Trust me, once you try them, you’ll be hooked!
Ingredients for S’more Bars
Gathering the right ingredients is the first step to creating these scrumptious S’more Bars. Here’s what you’ll need:
- Graham cracker crumbs: These provide the classic base for your bars, giving that signature crunch and flavor.
- Unsalted butter: Melted butter binds the crust together and adds richness. Unsalted is best to control the saltiness.
- Brown sugar: This sweetener adds a hint of caramel flavor and moisture to the crust, making it chewy and delicious.
- Mini marshmallows: These little puffs of sweetness create that gooey texture we all love in s’mores.
- Chocolate chips: Choose your favorite type—milk, dark, or even white chocolate—for a delightful chocolatey experience.
- Sweetened condensed milk: This creamy ingredient drizzles over the top, adding sweetness and helping everything stick together.
Feel free to get creative! You can add nuts for extra crunch or swap in different types of chocolate for a unique twist. If you’re looking for exact measurements, don’t worry! They’re listed at the bottom of the article and are available for printing.
How to Make S’more Bars
Now that you have your ingredients ready, let’s dive into the fun part—making these delicious S’more Bars! Follow these simple steps, and you’ll have a sweet treat that’s sure to impress.
Step 1: Preheat the Oven
First things first, preheat your oven to 350°F (175°C). Preheating is crucial because it ensures even baking. If you skip this step, your bars might not cook properly, leading to a gooey mess instead of a delicious treat. Trust me, a little patience goes a long way!
Step 2: Prepare the Crust
In a mixing bowl, combine your graham cracker crumbs, melted butter, and brown sugar. Stir until everything is well mixed. The mixture should resemble wet sand. This crust is the foundation of your S’more Bars, so make sure it’s evenly blended. It’s like building a cozy home for all that gooey goodness!
Step 3: Press the Mixture
Next, take your crust mixture and press it firmly into the bottom of a greased baking dish. Use your fingers or the back of a measuring cup to create an even layer. This step is important because a well-pressed crust holds everything together. Think of it as the sturdy base of a delicious dessert skyscraper!
Step 4: Add Toppings
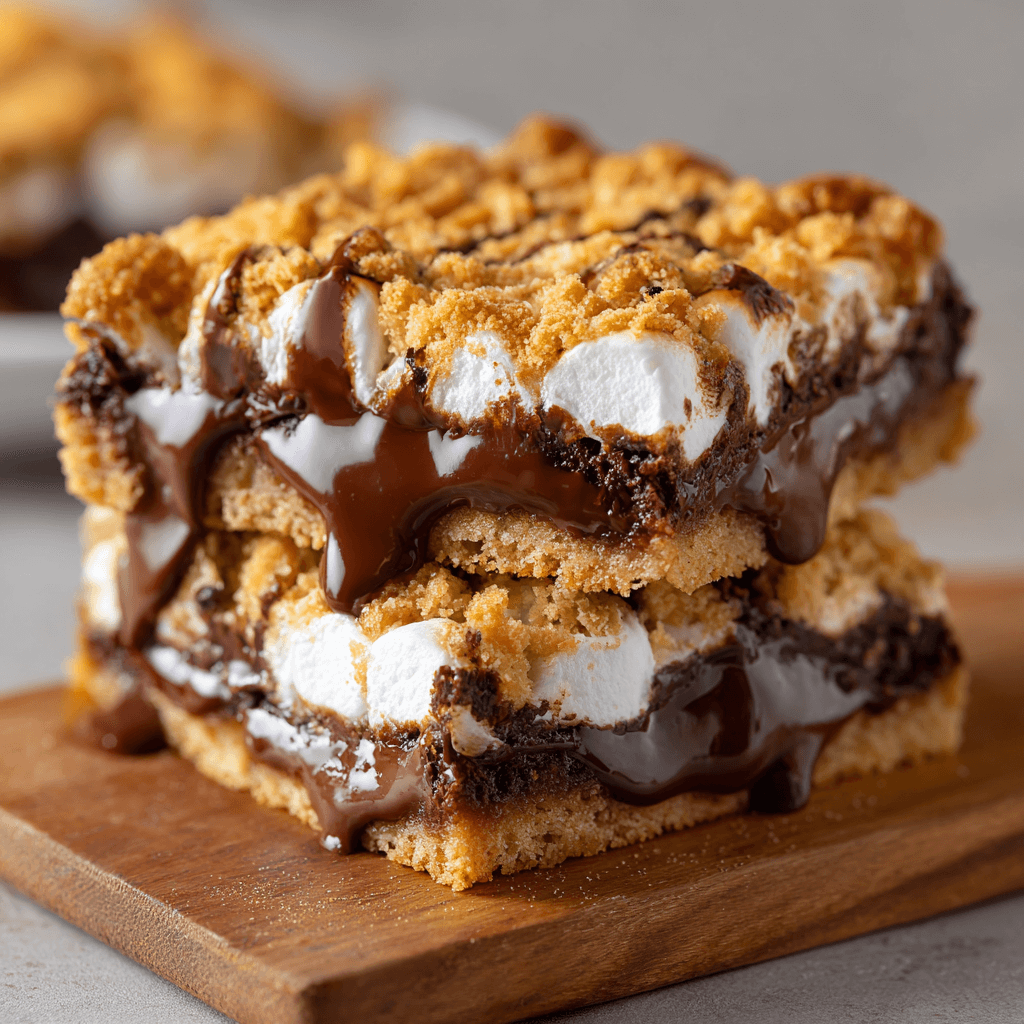
Now comes the fun part! Sprinkle the mini marshmallows and chocolate chips evenly over the crust. Feel free to get creative here—layer them as thick as you like! The marshmallows will puff up and create that classic s’mores texture, while the chocolate chips melt into a rich, gooey layer. It’s a match made in dessert heaven!
Step 5: Drizzle with Sweetened Condensed Milk
Grab your sweetened condensed milk and drizzle it generously over the top of the marshmallows and chocolate. This creamy goodness acts like glue, holding everything together and adding a touch of sweetness. It’s the secret ingredient that takes these S’more Bars from good to absolutely irresistible!
Step 6: Bake to Perfection
Pop your baking dish into the preheated oven and bake for 15-20 minutes. Keep an eye on them! You’ll know they’re done when the marshmallows are golden brown and the chocolate is melted. The aroma wafting through your kitchen will be heavenly, and you might find it hard to resist sneaking a taste!
Step 7: Cool and Cut
Once baked, remove the dish from the oven and let it cool for a bit. This step is crucial! If you cut into the bars too soon, they might fall apart. Allow them to cool completely before slicing into squares. Patience is key here, but I promise it will be worth the wait!
Tips for Success
- Use fresh ingredients for the best flavor—especially the chocolate and marshmallows.
- Don’t skip greasing the baking dish; it makes removing the bars a breeze.
- For a fun twist, try adding a sprinkle of sea salt on top before baking.
- Let the bars cool completely for cleaner cuts and better texture.
- Store leftovers in an airtight container to keep them fresh and chewy.
Equipment Needed
- Baking dish: A 9×9 inch dish works perfectly, but any similar size will do.
- Mixing bowl: Use a large bowl for easy mixing; a stand mixer can save time.
- Measuring cups: Essential for accurate ingredient portions; a kitchen scale is a great alternative.
- Spatula: A rubber spatula helps in mixing and spreading the crust evenly.
- Cooling rack: If you have one, it speeds up cooling; otherwise, a plate works just fine.
Variations of S’more Bars
- Nutty Delight: Add chopped nuts like walnuts or pecans for a crunchy texture that complements the gooeyness.
- Peanut Butter Swirl: Drizzle some creamy peanut butter over the chocolate layer before baking for a nutty twist.
- Gluten-Free Option: Substitute graham cracker crumbs with gluten-free alternatives, like almond flour or gluten-free cookies.
- Fruit Infusion: Toss in some sliced strawberries or bananas for a fruity flavor that brightens up the bars.
- Minty Fresh: Use mint chocolate chips instead of regular chocolate for a refreshing minty version.
Serving Suggestions for S’more Bars
- Pair with Ice Cream: Serve warm S’more Bars with a scoop of vanilla or chocolate ice cream for a delightful contrast.
- Garnish with Whipped Cream: A dollop of whipped cream on top adds a light, fluffy touch.
- Enjoy with Hot Cocoa: These bars are perfect alongside a steaming mug of hot cocoa for a cozy treat.
- Presentation: Cut into fun shapes using cookie cutters for a playful twist at parties.
For more recipes follow me in page Facebook and Pinterest
FAQs about S’more Bars
Can I make S’more Bars ahead of time?
Absolutely! You can prepare these S’more Bars a day in advance. Just store them in an airtight container at room temperature. They’ll stay delicious and chewy, ready for you to enjoy whenever you want!
What can I substitute for graham cracker crumbs?
If you don’t have graham cracker crumbs, you can use crushed cookies like digestive biscuits or vanilla wafers. They’ll give a different flavor but still create a tasty base for your S’more Bars.
How do I store leftover S’more Bars?
To keep your S’more Bars fresh, store them in an airtight container. They can last up to a week, but I doubt they’ll last that long once your family gets a taste!
Can I freeze S’more Bars?
Yes, you can freeze these bars! Just wrap them tightly in plastic wrap and then place them in a freezer-safe container. They’ll be good for up to three months. Thaw them in the fridge before enjoying!
What’s the best way to cut S’more Bars?
For clean cuts, make sure the bars are completely cool. Use a sharp knife and wipe it clean between cuts. This way, you’ll get those perfect squares without any mess!
Final Thoughts
Making S’more Bars is more than just baking; it’s about creating sweet memories with your loved ones. The joy of pulling these gooey, chocolatey treats from the oven fills the kitchen with warmth and nostalgia. Each bite transports you back to campfire nights, laughter, and shared stories. Whether you’re enjoying them after a long day or serving them at a gathering, these bars are sure to bring smiles all around. So, roll up your sleeves, gather your ingredients, and let the magic of S’more Bars brighten your day. Trust me, you won’t regret it!