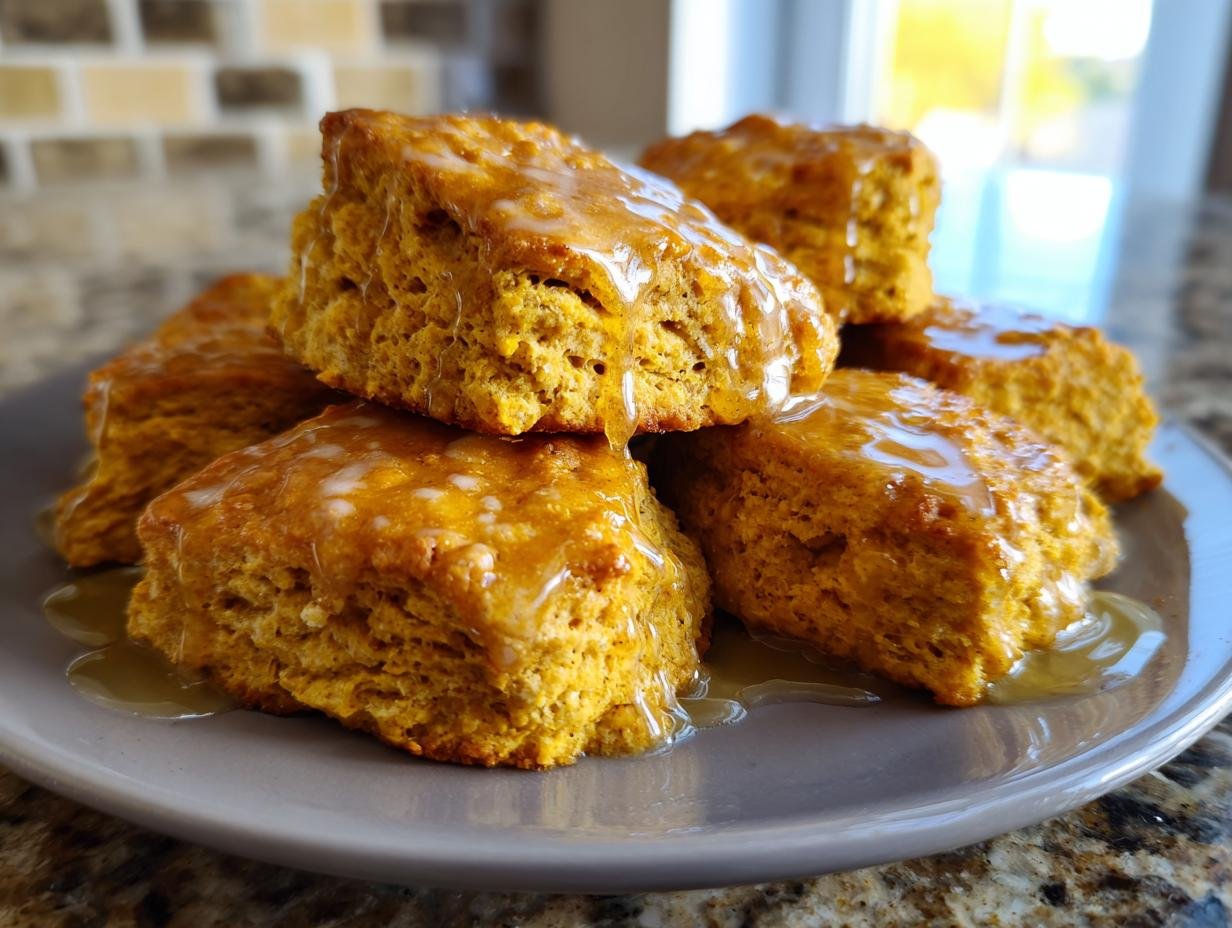
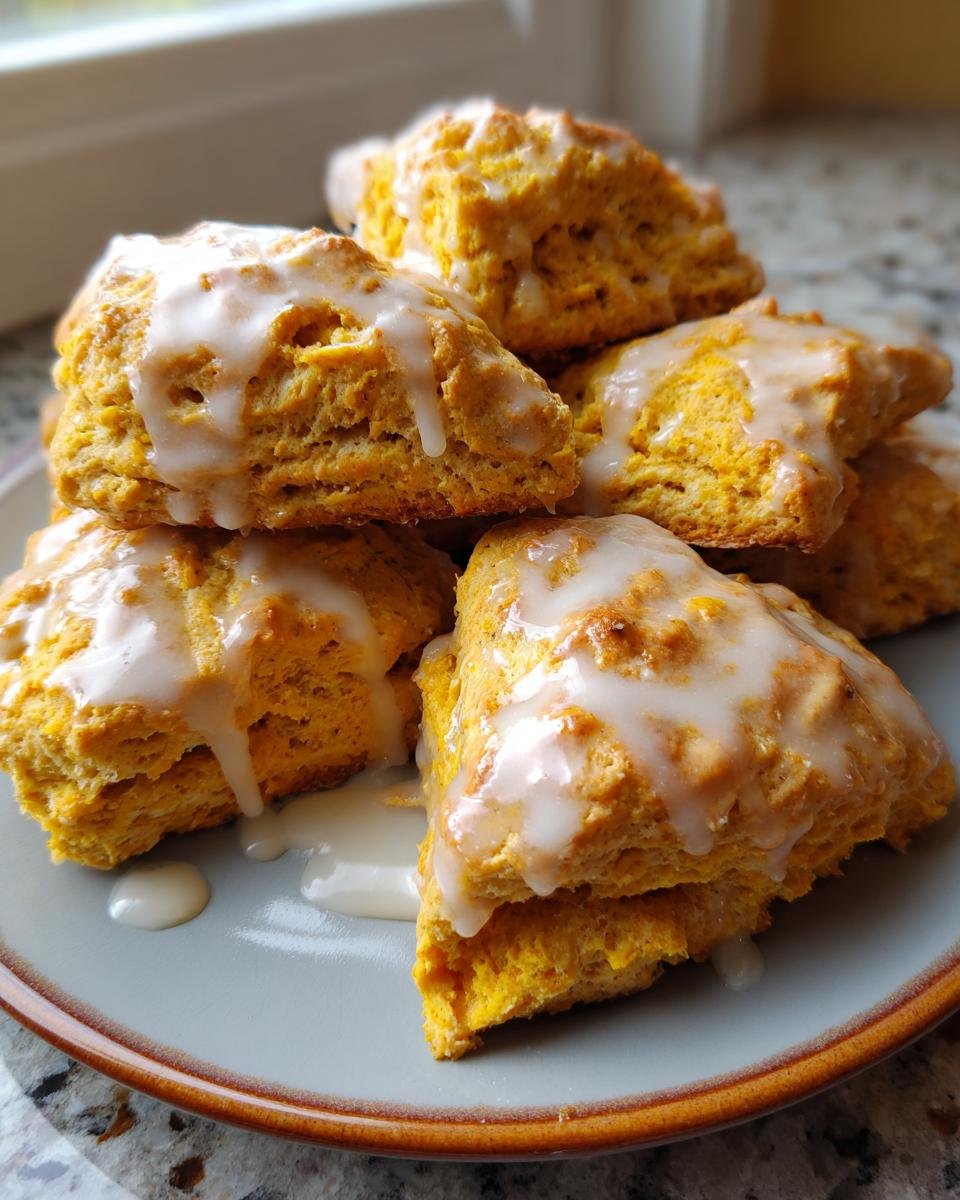
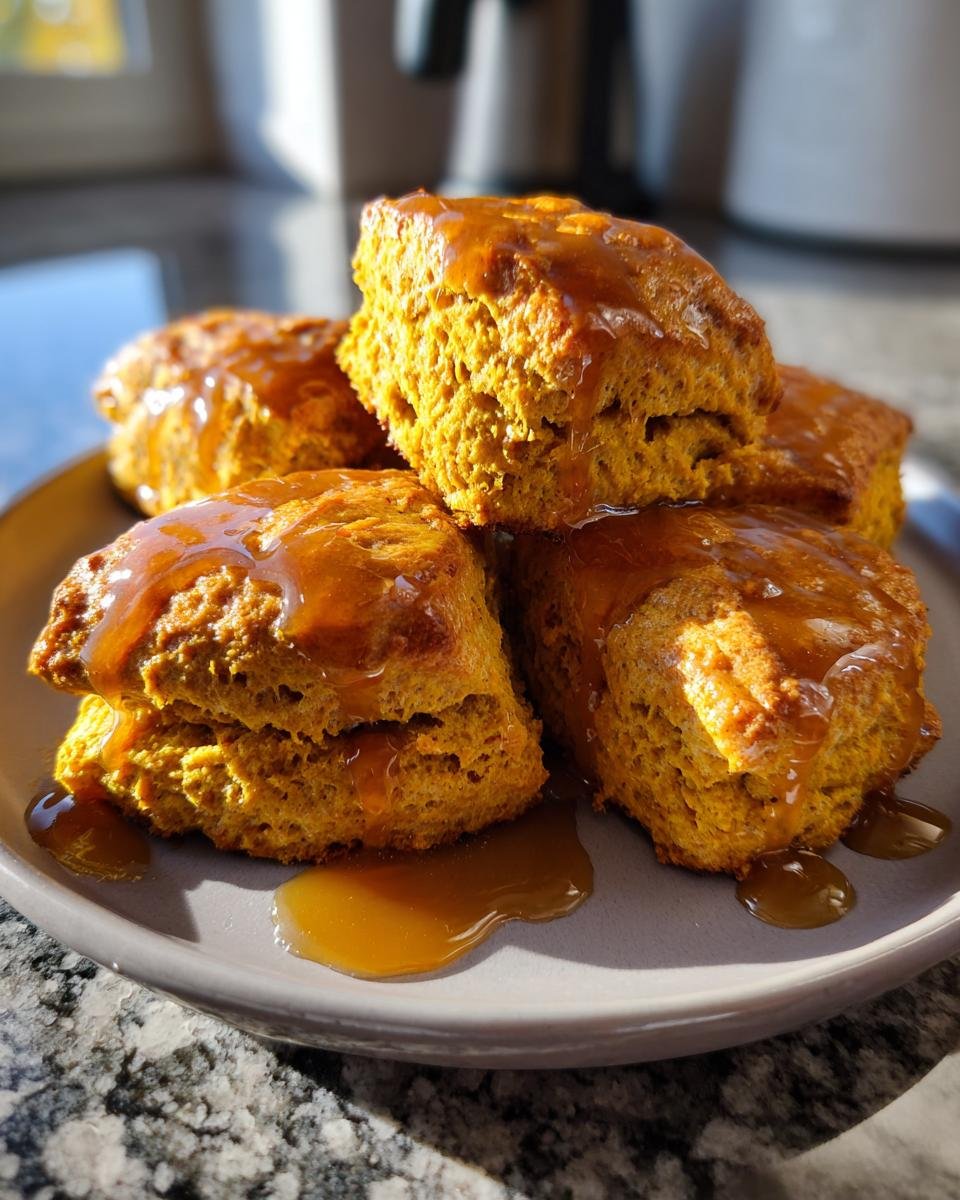
Oh, fall! That magical time of year when the air turns crisp, leaves transform into a kaleidoscope of colors, and the scent of pumpkin spice fills every cozy corner. I’m telling you, there’s just something about pumpkin flavors that brings me back to warm kitchens and laughter shared over steaming cups of tea. And of all the autumn treats, my absolute favorite has to be these Classic Pumpkin Scones with Maple Glaze. They’re not just scones; they’re little pockets of comfort that practically scream autumn with every bite!
These scones are wonderfully soft and slightly crumbly, thanks to the perfect blend of warm spices and real pumpkin puree. And don’t even get me started on the maple glaze—it’s like a sweet hug on a chilly day! They’re perfect for breakfast, an afternoon snack, or even as a delightful addition to your holiday brunch spread. Trust me; once you take a bite, you’ll be transported to a cozy café, even if you’re just at home in your pajamas. So, let’s dive into this recipe and bring a taste of fall into your kitchen!
Gathering the right ingredients is key to making these delightful Classic Pumpkin Scones. Here’s what you’ll need:
2 cups (250g) all-purpose flour (spooned & leveled) – Make sure to measure it correctly for the best texture!
2 and 1/2 teaspoons baking powder – This helps the scones rise beautifully.
1 teaspoon ground cinnamon – The warm, comforting spice that makes these scones feel like a hug.
1 and 1/2 teaspoons pumpkin pie spice – A lovely blend that adds depth to the pumpkin flavor.
1/2 teaspoon salt – Balances the sweetness perfectly.
1/2 cup (8 Tbsp; 113g) unsalted butter (frozen) – Freezing the butter is super important for that flaky texture; trust me!
1/3 cup + 2 Tablespoons (105ml) heavy cream, divided – This keeps the scones rich and moist.
1 large egg – A binder that helps everything come together.
1/2 cup (115g) canned pumpkin puree (blotted) – Blotting helps remove excess moisture, ensuring the perfect texture!
1/2 cup (100g) light brown sugar – Adds a lovely caramel note that complements the pumpkin.
1 teaspoon pure vanilla extract – For that warm, sweet aroma.
Optional: coarse sugar for sprinkling on top before baking – This gives your scones a lovely crunch and shine!
For the delicious maple glaze, you’ll need:
2 Tablespoons (28g) unsalted butter – Melted to give that rich flavor.
1/3 cup (80ml) pure maple syrup – The star ingredient that adds sweetness and depth!
1 cup (112g) sifted confectioners’ sugar – For that perfect drizzle consistency.
Pinch salt, to taste – Just a little bit to enhance all those sweet flavors.
How to Prepare Classic Pumpkin Scones
Prepping the Oven and Baking Sheets
First things first, let’s get that oven fired up! Preheating it to 400°F (204°C) is essential for getting those scones perfectly baked. You want that heat to be just right as soon as those scones hit the oven. While that’s warming up, grab your baking sheets and line them with either parchment paper or silicone mats. This step not only helps with easy cleanup but also ensures your scones won’t stick. Trust me, you don’t want to ruin these little gems with a broken scone disaster!
Mixing the Dry Ingredients
Now, onto the dry ingredients! In a large bowl, whisk together 2 cups of flour, 2 and 1/2 teaspoons of baking powder, 1 teaspoon of ground cinnamon, 1 and 1/2 teaspoons of pumpkin pie spice, and 1/2 teaspoon of salt. Make sure to whisk them thoroughly—this is crucial! You want everything evenly combined so that every scone is packed with that delicious pumpkin flavor. Plus, mixing well helps to aerate the flour, which is key for a light scone.
Incorporating the Butter
Here comes the fun part! Take that frozen butter and grate it directly into the dry mixture. I know it sounds a bit odd, but grating the butter helps create those lovely flaky layers that you want in a scone. Once you’ve grated it all in, use your fingers to gently mix it into the flour until the mixture resembles coarse crumbs. You want to see little pea-sized lumps of butter throughout—that’s where the magic happens!
Combining Wet Ingredients
In a separate small bowl, whisk together 1/3 cup of heavy cream, 1 large egg, 1/2 cup of canned pumpkin puree (remember to blot it!), 1/2 cup of light brown sugar, and 1 teaspoon of pure vanilla extract. This mixture is going to add moisture and flavor to your scones. Once it’s all combined, drizzle it over the flour mixture. Gently stir until everything is just moistened—don’t overmix! A few flour streaks are totally fine.
Shaping the Dough
Okay, time to get hands-on! Transfer the dough onto a floured surface. With floured hands, gently shape it into a ball and then press it into an 8-inch disc. The key here is to handle the dough as little as possible to keep it tender! Once you have your disc, use a sharp knife to cut it into 8 wedges. You can also use a pizza cutter for a smooth cut. Place those wedges on your prepared baking sheets, ensuring they’re at least 2 inches apart.
Baking the Scones
Now, let’s bake! Brush the tops of the scones with the remaining heavy cream and sprinkle with coarse sugar if you’re feeling fancy. Pop them into the oven and bake larger scones for 20-25 minutes or until they’re lightly browned, while smaller ones need about 18-20 minutes. Keep an eye on them—they should look golden and lovely, and you can always do the toothpick test if you’re unsure!
Preparing the Maple Glaze
While your scones are baking, let’s whip up that delicious maple glaze. In a small saucepan, melt 2 tablespoons of unsalted butter and 1/3 cup of pure maple syrup over low heat. Once melted, whisk in 1 cup of sifted confectioners’ sugar until you achieve a smooth consistency. If it’s too thick, just add a tiny splash of milk to loosen it up. A pinch of salt can also enhance all those sweet flavors!
Serving and Storing
Once those scones are baked to perfection, let them cool for a few minutes before drizzling with that glorious maple glaze. Enjoy them warm—there’s nothing like a fresh scone with a cup of coffee or tea! If you have leftovers (which is rare in my house!), you can store them at room temperature for a couple of days or in the fridge for up to two days. They also freeze beautifully for up to three months; just thaw them overnight in the fridge and warm them up before glazing. Happy baking!
Nutritional Information
Now, let’s talk numbers! Here’s the estimated nutritional breakdown for one of these delightful Classic Pumpkin Scones:
Calories: 210
Fat: 10g
Saturated Fat: 6g
Unsaturated Fat: 3g
Trans Fat: 0g
Cholesterol: 30mg
Sodium: 120mg
Carbohydrates: 28g
Fiber: 1g
Sugar: 10g
Protein: 2g
These values are estimates and can vary based on specific ingredient brands and measurements. But knowing this info can help you enjoy your scones while keeping an eye on your daily intake. So, go ahead and indulge a little—these scones are worth every bite!
FAQ Section
Can I use fresh pumpkin instead of canned?
Absolutely! You can use fresh pumpkin, but it requires a bit more effort. To prepare it, you’ll need to peel, seed, and cube the pumpkin, then steam or roast it until tender. After that, blend it until smooth and make sure to blot it to remove excess moisture, just like with canned pumpkin. This helps achieve that perfect scone texture. Fresh pumpkin can give a vibrant flavor, but be sure to adjust the moisture in your recipe accordingly!
How do I store leftover scones?
To keep your leftover scones fresh, let them cool completely, then store them in an airtight container at room temperature for up to two days. If you want to keep them longer, you can refrigerate them, which will extend their freshness for about two more days. Just remember to wrap them well to prevent them from drying out. When you’re ready to enjoy them, a quick warm-up in the microwave or oven brings back their lovely texture!
Can I freeze the scones?
You bet! These scones freeze beautifully. Simply let them cool completely, then place them in a freezer-safe bag or container, and they’ll last up to three months. When you’re ready to indulge, just take them out and thaw them overnight in the refrigerator. For that fresh-baked taste, pop them in the oven for a few minutes to warm them up before drizzling with glaze. You’ll feel like you just baked them!
Why You’ll Love This Recipe
Perfect for Fall: These Classic Pumpkin Scones embody the essence of autumn with their warm spices and cozy pumpkin flavor, making them an ideal treat for the season.
Easy to Make: With simple ingredients and straightforward steps, even novice bakers can whip these up with ease. You’ll feel like a pro in no time!
Deliciously Versatile: Enjoy them fresh out of the oven for breakfast, with your afternoon tea, or as a delightful addition to your holiday gatherings. They’re perfect for any occasion!
Maple Glaze Magic: The drizzle of sweet maple glaze adds a touch of indulgence, elevating these scones from ordinary to extraordinary.
Make Ahead and Freeze: You can prepare a batch in advance, freeze them, and have a homemade treat ready whenever the craving strikes. Perfect for busy mornings!
Customizable: Feel free to add your favorite mix-ins like nuts or dried fruits, or spice them up with an extra dash of cinnamon or nutmeg. The possibilities are endless!
Tips for Success
Making the perfect Classic Pumpkin Scones is all about attention to detail and a few handy tips. Here are my best pieces of advice to help you achieve scone perfection:
Chill your tools: If you can, throw your mixing bowl and even your whisk in the fridge for a bit before you start. Cold tools keep the butter solid longer, which is key for that flaky texture.
Don’t overmix: When you combine the wet and dry ingredients, remember that less is more! Overmixing can lead to tough scones, and nobody wants that. Just mix until everything is moistened, and then stop.
Properly measure your flour: Spoon and level your flour instead of scooping it straight from the bag. This way, you avoid packing it down and ending up with dry scones. Trust me, it makes all the difference!
Watch your baking time: Every oven is different, so keep an eye on your scones as they bake. They should be lightly browned on top and firm to the touch—if they’re starting to look golden, it’s time to check for doneness!
Experiment with spices: If you love a little kick, don’t hesitate to add more spices like nutmeg or ginger. Adjusting the spices can personalize the scones to match your taste perfectly.
Let them cool: After baking, let your scones cool on a wire rack before glazing. This helps them set properly and prevents the glaze from melting away into a puddle.
Store wisely: If you have any leftovers (again, rare in my house!), make sure they’re stored in an airtight container. This keeps them fresh and prevents them from drying out.
With these tips, you’ll be well on your way to creating scones that will impress everyone around your table—whether it’s a cozy family breakfast or a festive gathering! Happy baking!
Variations
One of the best things about Classic Pumpkin Scones is their versatility! You can easily customize them to match your taste or make them a bit more special for different occasions. Here are some fun ideas to make these scones your own:
Nutty Delight: Add 1/2 cup of chopped pecans or walnuts to the dough for a lovely crunch and additional flavor. Nuts pair beautifully with pumpkin and spices!
Chocolate Chip Twist: For a sweet treat, incorporate 1/2 cup of chocolate chips into the batter. The melty chocolate adds a delicious contrast to the warm spices.
Spice it Up: If you love a stronger spice flavor, increase the pumpkin pie spice to 2 teaspoons, or even add a dash of cayenne pepper for a surprising kick!
Fruit Fusion: Toss in some 1/2 cup of dried cranberries or raisins for a touch of tartness that complements the sweetness of the pumpkin.
Maple Pecan Variation: Instead of the regular maple glaze, try a maple pecan glaze by adding chopped pecans to the glaze mixture for a delightful crunch and an extra layer of flavor.
Cream Cheese Filling: Make these scones even more indulgent by adding a cream cheese filling. Simply mix together 4 ounces of softened cream cheese, 2 tablespoons of sugar, and a little vanilla extract, then place a dollop in the center of each wedge before baking!
Orange Zest Boost: For a refreshing twist, add the zest of an orange to the dough. The citrusy flavor brightens up the scones and enhances the pumpkin taste.
These variations can transform your scones into new favorites time and time again. Feel free to mix and match ideas, and don’t be afraid to experiment—after all, baking is all about having fun in the kitchen!
Serving Suggestions
When it comes to enjoying your freshly baked Classic Pumpkin Scones, there are so many delightful pairings that can elevate your experience to the next level! Here are a few of my favorite serving suggestions that I think you’ll absolutely love:
Warm Beverages: A steaming cup of coffee or chai tea is the perfect companion for these scones. The rich flavors of the coffee complement the spices beautifully, while chai adds an extra layer of warmth.
Spiced Apple Cider: For a festive autumn touch, serve your scones with a glass of spiced apple cider. The gentle sweetness and spices in the cider perfectly match the pumpkin flavors.
Maple Butter: Spread some maple butter on your scones for an irresistible sweet kick! Just blend softened butter with maple syrup until creamy. It’s heavenly!
Whipped Cream: A dollop of freshly whipped cream makes for a delightful topping. You can even add a hint of vanilla or cinnamon to the cream for extra flavor.
Fruit Preserves: Try pairing your scones with some fruit preserves or jams, like raspberry or apricot. The tartness of the fruit contrasts wonderfully with the sweet pumpkin flavor.
Cheese Spread: For a savory twist, serve with a creamy cheese spread. A soft goat cheese or cream cheese blend with herbs can add a nice contrast to the sweetness of the scones.
Whatever you choose, these serving suggestions will bring even more joy to your Classic Pumpkin Scones experience. So grab a cozy blanket, your favorite drink, and savor every delicious bite!
Equipment List
Before you dive into baking these delightful Classic Pumpkin Scones, it’s helpful to gather all the necessary tools and equipment. Having everything prepared will make your baking experience smooth and enjoyable. Here’s what you’ll need:
Large Mixing Bowl: A sturdy bowl for mixing your dry ingredients and combining the dough.
Small Mixing Bowl: For whisking together your wet ingredients before adding them to the dry mix.
Whisk: A good whisk is essential for blending your dry ingredients evenly and ensuring a smooth wet mixture.
Grater: You’ll need a box grater to grate the frozen butter into the flour mixture. It’s key for achieving that flaky texture!
Measuring Cups and Spoons: Accurate measurements are crucial for baking. Make sure you have both dry and liquid measuring cups, along with measuring spoons.
Sharp Knife or Pizza Cutter: For cutting the dough into wedges, a sharp knife or pizza cutter will give you clean, even cuts.
Baking Sheets: Two baking sheets are ideal for holding your scones while they bake. Line them with parchment paper or silicone mats for easy release.
Silicone Spatula: A spatula will help you gently fold the dough and transfer the scones to the baking sheets without deflating them.
Wire Rack: Once baked, a wire rack is perfect for cooling the scones and preventing them from getting soggy.
Small Saucepan: To melt the butter and maple syrup for your glaze, a small saucepan is perfect for the job.
With these tools at the ready, you’ll be all set to whip up a batch of irresistible scones that will fill your kitchen with the warm, inviting smells of fall!
Ingredient Notes/Substitutions
When it comes to making Classic Pumpkin Scones, understanding your ingredients can truly elevate your baking game. Here are some specific notes about the key ingredients and potential substitutions to suit various dietary preferences:
All-Purpose Flour: This is the foundation of your scones, giving them structure. If you’re looking for a gluten-free option, you can use a 1:1 gluten-free baking flour blend. Just make sure it has xanthan gum included to help with texture!
Unsalted Butter: I love using unsalted butter for better control over the saltiness in my scones. If you need a dairy-free option, try using cold coconut oil or a vegan butter substitute. Just be aware that the texture might vary slightly.
Heavy Cream: For a lighter alternative, you can use half-and-half or a non-dairy milk like almond or oat milk. However, the richness will be slightly reduced. If you’re avoiding dairy, consider using coconut cream for that creamy texture.
Canned Pumpkin Puree: If you have fresh pumpkin on hand, feel free to use it! Just make sure to cook and blend it until smooth, and remember to blot it to remove excess moisture. This gives a fresher taste, but canned pumpkin is perfectly convenient and consistent!
Light Brown Sugar: For a refined sugar-free option, you can substitute with coconut sugar or maple sugar. These alternatives provide a lovely caramel flavor similar to brown sugar while being less processed.
Egg: If you’re looking for an egg substitute, you can use a flax egg (1 tablespoon ground flaxseed mixed with 2.5 tablespoons water, let it sit for a few minutes) or 1/4 cup of unsweetened applesauce. Both options help bind the ingredients together!
Maple Syrup: If you’re not a fan of maple or want to use something else, agave syrup or honey can work as a sweet alternative for the glaze. Just keep in mind that honey is not vegan.
Coarse Sugar: For the topping, you can use regular granulated sugar or even turbinado sugar for a bit of crunch. If you’re avoiding sugar altogether, consider a sprinkle of cinnamon instead for extra flavor without the sweetness.
These substitutions offer flexibility while ensuring you still get that cozy pumpkin flavor in your scones. Don’t be afraid to experiment with different ingredients to make this recipe your own!
1/3 cup + 2 Tablespoons (105ml) heavy cream, divided
1 large egg
1/2 cup (115g) canned pumpkin puree, blotted
1/2 cup (100g) light brown sugar
1 teaspoon pure vanilla extract
Optional: coarse sugar for sprinkling on top before baking
Maple Glaze: 2 Tablespoons (28g) unsalted butter
1/3 cup (80ml) pure maple syrup
1 cup (112g) sifted confectioners’ sugar
Pinch salt, to taste
Instructions
Preheat oven to 400°F (204°C). Adjust baking rack to the middle-low position. Line baking sheets with parchment paper or silicone baking mat(s).
Whisk flour, baking powder, cinnamon, pumpkin pie spice, and salt in a large bowl. Grate frozen butter and add to flour mixture. Combine until mixture forms pea-sized crumbs.
Whisk 1/3 cup heavy cream, egg, blotted pumpkin, brown sugar, and vanilla extract in a small bowl. Drizzle over flour mixture and mix until moistened.
With floured hands, shape the dough into a ball and transfer to a floured surface. Press into an 8-inch disc and cut into 8 wedges.
Place scones at least 2 inches apart on prepared baking sheets. Brush with remaining heavy cream and sprinkle with coarse sugar if desired.
Bake larger scones for 20-25 minutes or until lightly browned. Bake smaller scones for 18-20 minutes. Allow to cool for a few minutes.
For the glaze, melt butter and maple syrup in a small saucepan over low heat. Whisk in sifted confectioners’ sugar and add salt if desired. Drizzle over warm scones.
Enjoy scones right away or store at room temperature or in the refrigerator for 2 extra days.
Notes
Plain baked scones freeze well for up to 3 months. Thaw overnight in the refrigerator and heat before icing.
Prep Time:20 minutes
Cook Time:25 minutes
Category:Baked Goods
Method:Baking
Cuisine:American
Nutrition
Serving Size:1 scone
Calories:210
Sugar:10g
Sodium:120mg
Fat:10g
Saturated Fat:6g
Unsaturated Fat:3g
Trans Fat:0g
Carbohydrates:28g
Fiber:1g
Protein:2g
Cholesterol:30mg
Keywords: Pumpkin Scones, Scones, Pumpkin Recipes, Fall Recipes