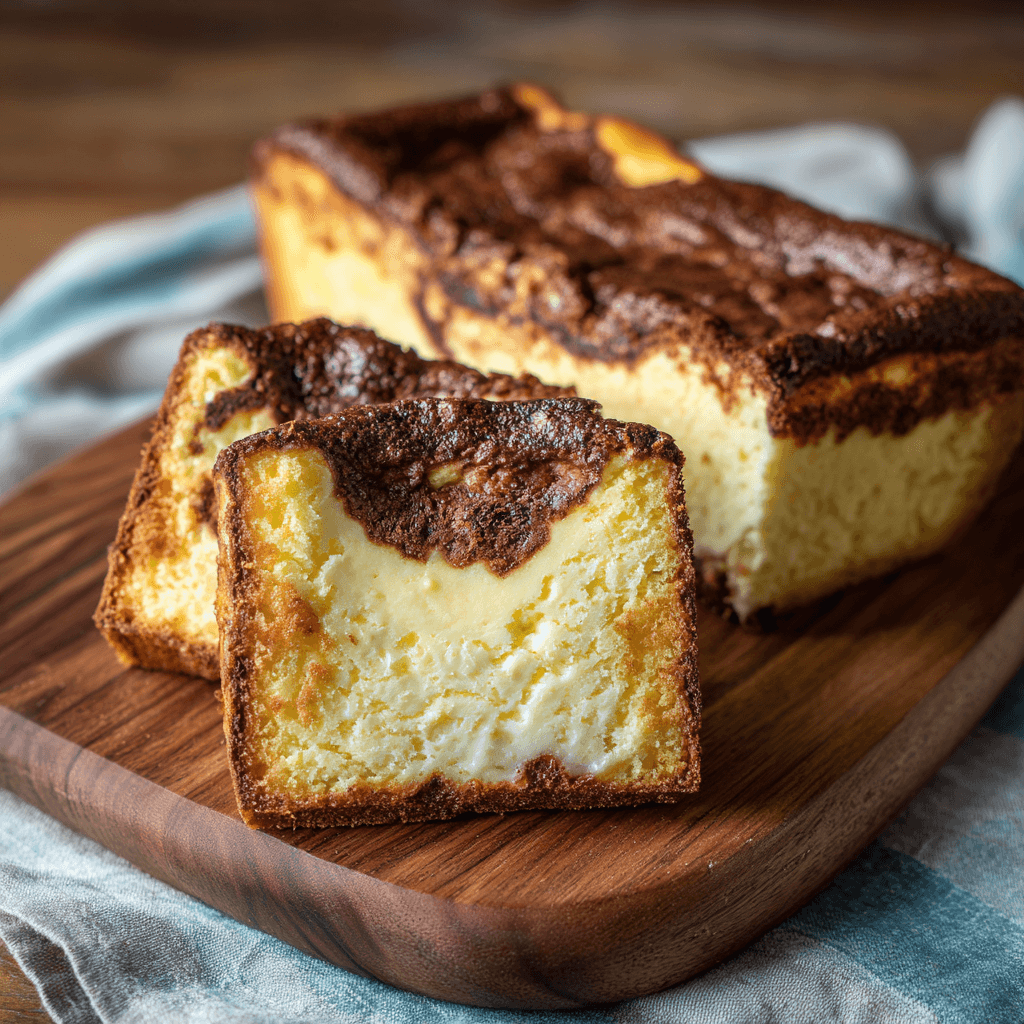
Welcome to the delightful world of baking! If you’re like me, juggling a busy schedule while trying to whip up something special, the Basque Cheesecake Loaf Pan Kit is your new best friend. This homemade recipe is not just about creating a delicious dessert; it’s about bringing joy to your kitchen and impressing your loved ones with minimal effort. Imagine serving a creamy, rich cheesecake that looks as good as it tastes, all made in a loaf pan. It’s the perfect solution for a quick treat or a show-stopping dessert at your next gathering!

Basque Cheesecake Loaf Pan Kit: Bake Perfection at Home!
- Total Time: 4 hours 20 minutes
- Yield: 8 servings 1x
- Diet: Vegetarian
Description
A deliciously creamy and rich Basque cheesecake made in a loaf pan, perfect for home baking enthusiasts.
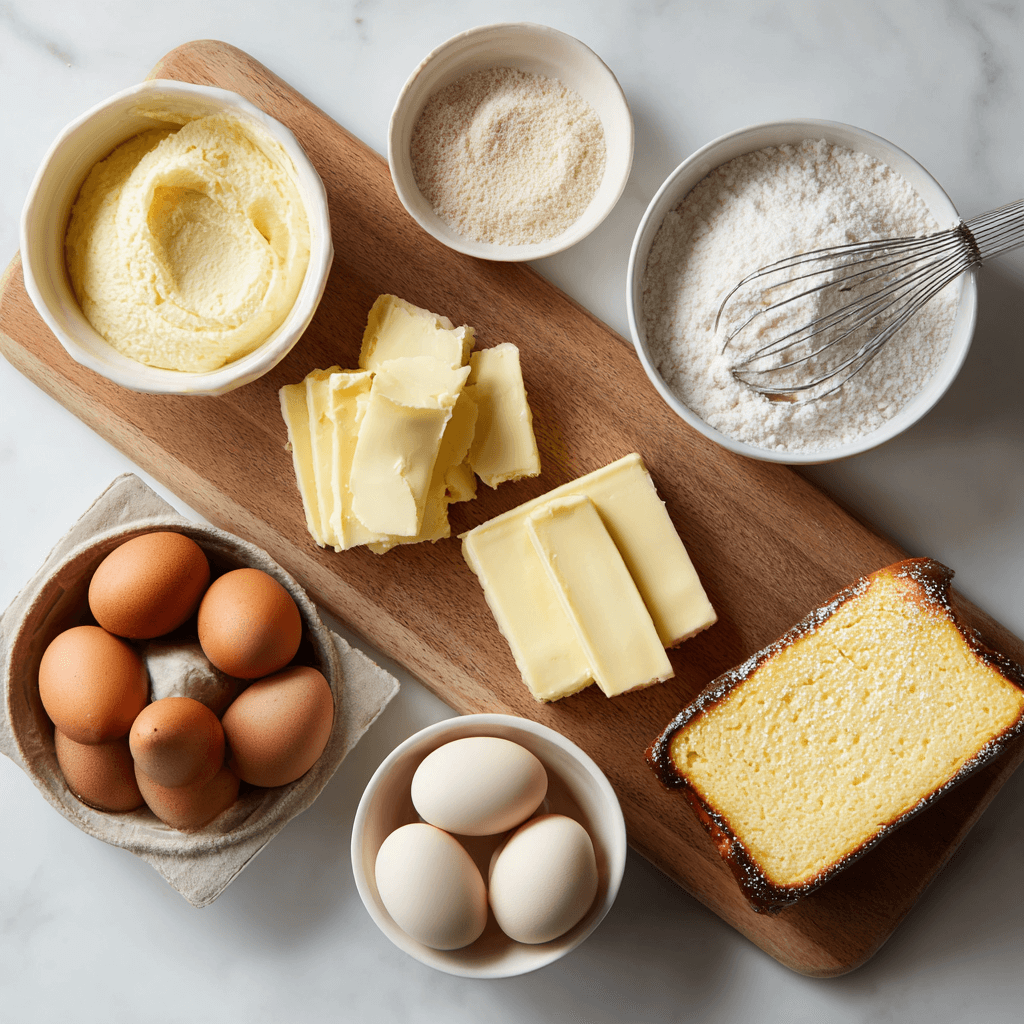
Ingredients
- 2 cups cream cheese
- 1 cup granulated sugar
- 3 large eggs
- 1 cup heavy cream
- 1 teaspoon vanilla extract
- 1/4 cup all-purpose flour
Instructions
- Preheat your oven to 400°F (200°C).
- In a large mixing bowl, beat the cream cheese and sugar until smooth.
- Add the eggs one at a time, mixing well after each addition.
- Stir in the heavy cream and vanilla extract until fully combined.
- Gradually add the flour and mix until just incorporated.
- Pour the batter into a greased loaf pan.
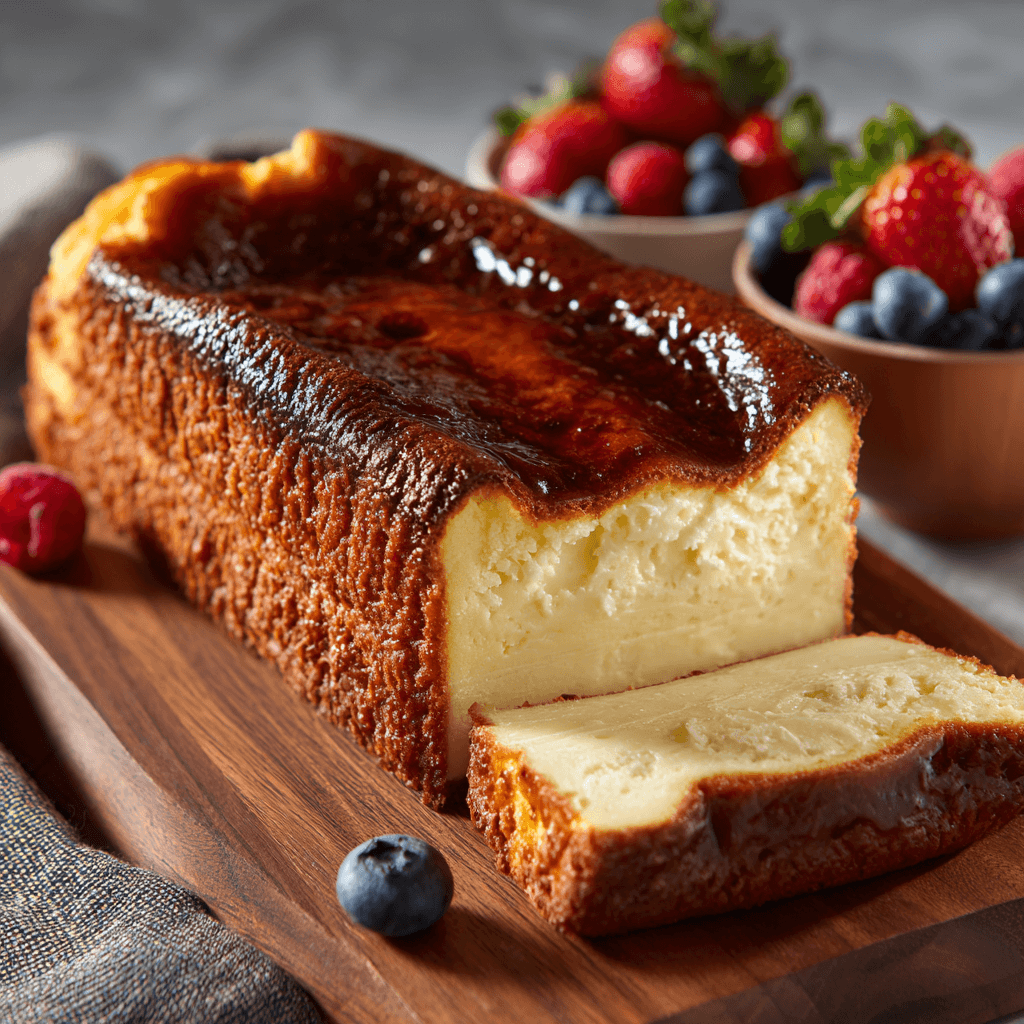
- Bake for 50-60 minutes or until the top is dark brown and the center is slightly jiggly.
- Let it cool completely before removing from the pan.
- Chill in the refrigerator for at least 4 hours before serving.
Notes
- For best results, use room temperature ingredients.
- Serve with fresh berries or a fruit compote for added flavor.
- Store leftovers in the refrigerator for up to 3 days.
- Prep Time: 20 minutes
- Cook Time: 60 minutes
- Category: Dessert
- Method: Baking
- Cuisine: Spanish
Nutrition
- Serving Size: 1 slice
- Calories: 350
- Sugar: 25g
- Sodium: 200mg
- Fat: 25g
- Saturated Fat: 15g
- Unsaturated Fat: 5g
- Trans Fat: 0g
- Carbohydrates: 30g
- Fiber: 1g
- Protein: 6g
- Cholesterol: 100mg
Keywords: Basque Cheesecake, Homemade Recipe, Baking Pan, Loaf Pan Kit
Table of Contents
Why You’ll Love This Basque Cheesecake Loaf Pan Kit
This Basque Cheesecake Loaf Pan Kit is a game-changer for busy moms and professionals alike. It combines ease and speed, allowing you to create a stunning dessert without spending hours in the kitchen. The rich, creamy texture and caramelized top will have your family and friends raving. Plus, the loaf pan makes for easy slicing and serving, so you can focus on enjoying the moment rather than stressing over presentation!
Ingredients for Basque Cheesecake Loaf Pan Kit
Gathering the right ingredients is the first step to baking success! Here’s what you’ll need for this luscious Basque cheesecake:
- Cream Cheese: The star of the show! It gives the cheesecake its rich and creamy texture. Make sure it’s at room temperature for easy mixing.
- Granulated Sugar: This sweetens the cheesecake and helps create that beautiful caramelized top. You can substitute with brown sugar for a deeper flavor.
- Large Eggs: They provide structure and richness. Always add them one at a time for the best results.
- Heavy Cream: This adds a luxurious creaminess. If you’re looking for a lighter version, you can use half-and-half.
- Vanilla Extract: A splash of this enhances the flavor beautifully. For a twist, try almond extract instead!
- All-Purpose Flour: Just a bit to help bind everything together. If you’re gluten-free, a gluten-free flour blend works well too.
For exact measurements, check the bottom of the article where you can find a printable version of the recipe. Happy baking!
How to Make Basque Cheesecake Loaf Pan Kit
Now that you have your ingredients ready, let’s dive into the steps to create this heavenly Basque cheesecake. Each step is simple, and I promise you’ll feel like a pro in no time!
Step 1: Preheat the Oven
First things first, preheat your oven to 400°F (200°C). Preheating is crucial because it ensures even baking. If you skip this step, your cheesecake might not rise properly, and we want that beautiful, caramelized top!
Step 2: Prepare the Cream Cheese Mixture
In a large mixing bowl, beat the cream cheese and granulated sugar together until smooth. This is where the magic begins! You want a creamy texture without any lumps. I usually use a hand mixer for this, but a whisk works too—just be prepared for a workout!
Step 3: Incorporate the Eggs
Next, add the eggs one at a time, mixing well after each addition. This step is key for a light and airy cheesecake. It allows the eggs to blend seamlessly into the mixture, creating that rich texture we all love.
Step 4: Add Cream and Vanilla
Now, stir in the heavy cream and vanilla extract. This is where your cheesecake gets its luxurious flavor. The heavy cream adds richness, while the vanilla brings warmth. Don’t rush this step; mix until everything is fully combined!
Step 5: Mix in the Flour
Gradually add the all-purpose flour to the mixture. It’s important to mix until just incorporated. Overmixing can lead to a dense cheesecake, and we want it to be light and fluffy. A gentle fold is all you need!
Step 6: Pour into the Loaf Pan
Before pouring, make sure to grease your loaf pan well. This will help your cheesecake slide out easily later. Once greased, pour the batter into the pan, smoothing the top with a spatula. It’s okay if it’s not perfect; it’ll bake beautifully!
Step 7: Bake to Perfection
Place your loaf pan in the preheated oven and bake for 50-60 minutes. Keep an eye on it! The top should be dark brown, and the center should still be slightly jiggly. This is the sweet spot for that creamy texture.
Step 8: Cooling and Chilling
Once baked, let your cheesecake cool completely in the pan. This step is essential for the flavors to settle. After cooling, transfer it to the refrigerator and chill for at least 4 hours before serving. Trust me, the wait is worth it!
Tips for Success
- Always use room temperature ingredients for a smoother batter.
- Don’t rush the mixing process; it’s key to achieving that creamy texture.
- Check your cheesecake a few minutes before the timer goes off to avoid overbaking.
- Let it cool completely before chilling to enhance the flavors.
- For a fun twist, try adding a hint of citrus zest to the batter!
Equipment Needed for Basque Cheesecake Loaf Pan Kit
- Loaf Pan: A standard 9×5 inch loaf pan works best. If you don’t have one, a round cake pan can be a substitute.
- Mixing Bowls: Use a large bowl for mixing. A stand mixer can save time, but a hand mixer or whisk will do just fine.
- Spatula: A rubber spatula is perfect for scraping down the sides and smoothing the batter.
- Measuring Cups and Spoons: Essential for accuracy. If you’re in a pinch, use a kitchen scale for precise measurements.
Variations of Basque Cheesecake Loaf Pan Kit
- Chocolate Swirl: Add melted chocolate to the batter for a rich chocolatey twist. Swirl it in before baking for a marbled effect.
- Citrus Zest: Incorporate lemon or orange zest into the batter for a refreshing citrus flavor that brightens the cheesecake.
- Berry Bliss: Fold in fresh or frozen berries like blueberries or raspberries for a fruity burst in every bite.
- Nutty Crunch: Add crushed nuts, such as almonds or pecans, to the batter for added texture and flavor.
- Gluten-Free Option: Substitute all-purpose flour with a gluten-free flour blend to make this cheesecake suitable for gluten-sensitive friends.
Serving Suggestions for Basque Cheesecake Loaf Pan Kit
- Serve with a dollop of whipped cream for extra indulgence.
- Pair with fresh berries or a berry compote for a pop of color and flavor.
- Drizzle with chocolate or caramel sauce for a decadent touch.
- Enjoy with a cup of coffee or tea for a delightful afternoon treat.
- Garnish with mint leaves for a fresh, elegant presentation.
For more recipes follow me in page Facebook and Pinterest
FAQs about Basque Cheesecake Loaf Pan Kit
Can I use a different pan for this recipe? Absolutely! While a loaf pan is ideal for this Basque cheesecake, you can use a round cake pan. Just keep an eye on the baking time, as it may vary slightly.
How do I know when my cheesecake is done baking? The top should be a deep brown color, and the center should still have a slight jiggle. It will firm up as it cools, giving you that perfect creamy texture.
Can I make this cheesecake ahead of time? Yes! This cheesecake actually tastes better after chilling for a few hours or even overnight. It’s a great make-ahead dessert for gatherings!
What can I serve with Basque cheesecake? Fresh berries, whipped cream, or a drizzle of chocolate sauce make excellent accompaniments. You can also serve it with a cup of coffee or tea for a delightful pairing.
How should I store leftovers? Store any leftovers in an airtight container in the refrigerator for up to three days. Just be sure to let it come to room temperature before serving for the best flavor!
Final Thoughts on Basque Cheesecake Loaf Pan Kit
Baking the Basque Cheesecake Loaf Pan Kit is more than just a recipe; it’s an experience filled with joy and satisfaction. The creamy texture and rich flavor will have your family asking for seconds, and the ease of preparation makes it a perfect choice for busy days. I love how this cheesecake brings everyone together, whether it’s a casual family dinner or a festive gathering. With each slice, you’re not just serving dessert; you’re sharing a piece of happiness. So, roll up your sleeves, grab your loaf pan, and let the baking magic begin!