Oh, let me tell you about the joy of making fried pies! There’s something truly magical about biting into a warm, flaky crust filled with sweet, juicy fruit. The delightful taste of these little treasures just brings back memories of family gatherings and summer picnics. I remember my grandmother would whip up a batch, and the whole house would smell heavenly! Fried pies are not just a dessert; they’re a treat that can brighten up any day, whether you want something sweet after dinner or a snack to enjoy with your afternoon coffee. Trust me, once you try making them, you’ll understand why they hold such a special place in my heart. So, let’s roll up our sleeves and dive into this delicious adventure together!
Ingredients List
To create the most delightful fried pies, you’ll need the following ingredients. Each one plays a crucial role in crafting that perfect flaky crust and luscious filling:
- 2 ½ cups all-purpose flour
- 1 tablespoon granulated sugar
- ½ teaspoon salt
- 1 teaspoon baking powder
- ½ cup unsalted butter, cold, cut into small cubes
- ½ cup cold water (add more if needed)
- 1 teaspoon vanilla extract (optional, but it adds a lovely flavor)
- 2 cups fresh or canned fruit (think apples, peaches, or cherries), chopped
- ½ cup granulated sugar (feel free to adjust based on the sweetness of your fruit)
- 1 tablespoon cornstarch (this helps thicken the filling)
- 1 tablespoon lemon juice (optional, but it brightens the flavor)
- 1 teaspoon ground cinnamon (optional, for a cozy spice note)
- Vegetable oil or sunflower oil for frying
- Powdered sugar, for dusting (skip if you prefer them plain)
Gather these ingredients and get ready to whip up a batch of fried pies that will make your taste buds dance!
How to Prepare Fried Pies
Now, let’s get our hands a little messy and dive into the wonderful process of making fried pies! Trust me, the end result is worth every moment spent in the kitchen. Follow these steps closely, and you’ll be treating yourself to some golden, fruity goodness in no time!
Making the Dough
First things first, we need to whip up that flaky dough that will cradle our delicious filling. In a large bowl, go ahead and whisk together the flour, sugar, salt, and baking powder until it’s all well combined. This is where the magic begins! Next, grab your cold butter—make sure it’s cold—and cut it into the flour mixture using a pastry cutter or your fingers until it resembles coarse crumbs. Don’t rush this part; the little butter pieces will create those flaky layers we all love.
If you’re feeling fancy, stir in a teaspoon of vanilla extract here—it adds a lovely hint of flavor! Now, it’s time to bring the dough together. Add cold water one tablespoon at a time, gently mixing until the dough just comes together. You don’t want to overwork it, so stop as soon as it holds. Once it’s ready, turn it out onto a floured surface and knead it gently until smooth.
Wrap the dough in plastic wrap and pop it in the fridge for about 30 minutes. This resting period is crucial; it helps the gluten relax and makes for a tender crust!
Preparing the Filling
While the dough is chilling, let’s prepare the filling. In a medium saucepan, combine your chopped fruit, sugar, cornstarch, lemon juice, and cinnamon (if you’re using it). This is where you can really customize your pies—feel free to mix and match your favorite fruits!
Cook this mixture over medium heat, stirring often, until it thickens up and the fruit becomes soft—this usually takes about 10 minutes. It should smell heavenly! Once thickened, remove it from the heat and let it cool slightly. This step is important because adding hot filling to your dough can make it too soggy.
Assembling the Pies
Now comes the fun part! Roll out your chilled dough on a floured surface to about ⅛-inch thickness. Use a round cutter or even a glass to cut out 4–5 inch circles. Don’t worry if they’re not perfect—just think of them as rustic charms!
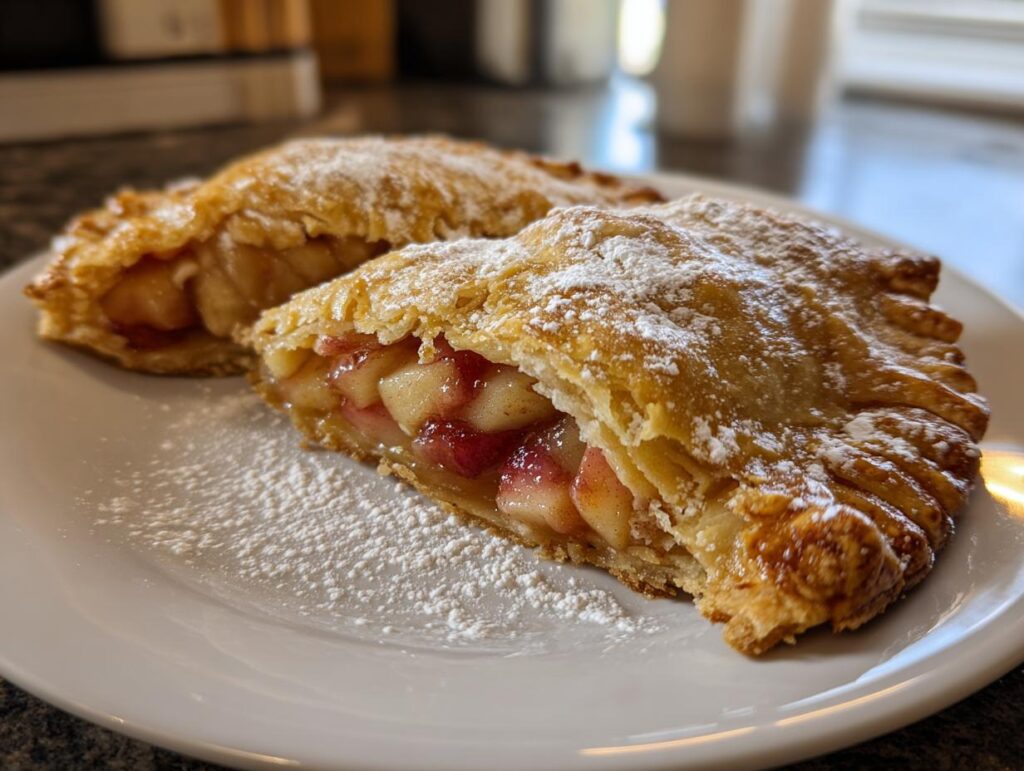
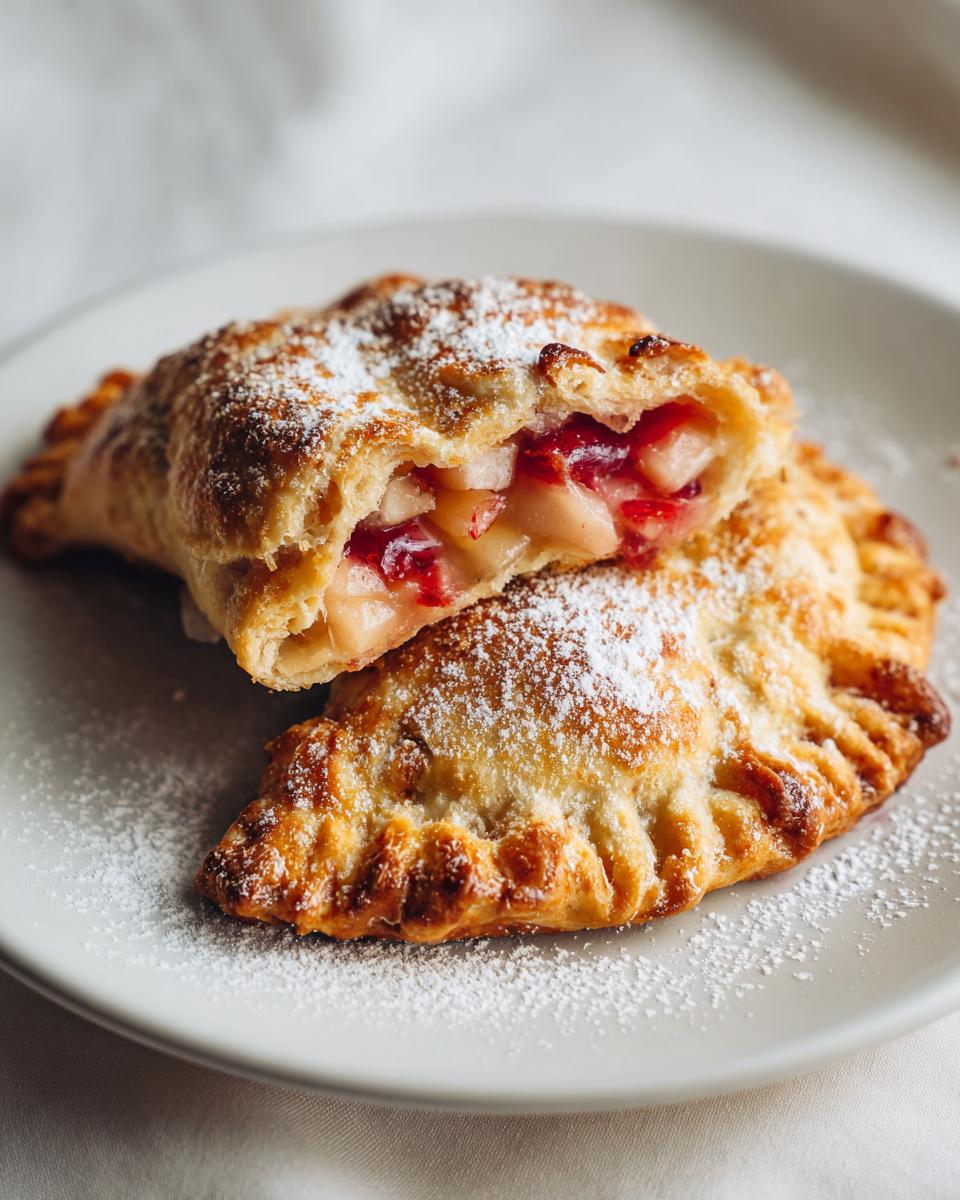
Next, place 1–2 tablespoons of your fruit filling in the center of each circle. Then, fold the dough over to create a half-moon shape. Here’s a little tip: press the edges together firmly and use a fork to crimp the edges, sealing them in all that fruity goodness. This step not only secures the filling but also gives your pies a lovely decorative touch!
Frying the Pies
Alright, it’s time to fry! In a deep skillet, heat about 2 inches of vegetable oil to 350°F (175°C). This is the perfect temperature for achieving that crispy, golden-brown crust we’re all after. Careful now, it splatters a bit, so use a thermometer if you have one!
Fry the pies in batches, making sure not to overcrowd the skillet. Each pie should fry for about 2–3 minutes on each side, or until they’re beautifully golden. Once they’re done, remove them and drain on paper towels to soak up extra oil.
Let them cool slightly before dusting with powdered sugar, if you like. Trust me, serving these warm is the best way to enjoy them! Now, take a moment to bask in the aroma of your freshly fried pies. You did it!
Tips for Success
Making perfect fried pies is all about a few key tips that can elevate your baking game! First, let’s talk about the dough. If you want an extra flaky crust, make sure your butter is really cold. Some folks even freeze it for a bit before cutting it in. This trick makes a world of difference!
When it comes to frying, oil temperature is crucial. If it’s too hot, your pies will brown too quickly and stay raw inside; too cool, and they’ll soak up too much oil. A good way to test is to drop a small piece of dough into the oil—if it sizzles and rises to the surface, you’re good to go!
As for storage, fried pies are best enjoyed fresh. But if you have leftovers (which is rare!), store them in an airtight container in the fridge. To reheat, pop them in a hot oven for a few minutes to regain that lovely crispness. You’ll thank yourself later for keeping that texture intact!
With these tips in your back pocket, you’re well on your way to mastering the art of fried pies!
Nutritional Information Section
Curious about the nutritional value of these delightful fried pies? Here’s an estimated breakdown per pie, so you can enjoy them guilt-free while keeping an eye on what you’re munching on:
- Calories: 250
- Fat: 10g
- Saturated Fat: 5g
- Unsaturated Fat: 3g
- Trans Fat: 0g
- Cholesterol: 20mg
- Sodium: 100mg
- Carbohydrates: 30g
- Fiber: 1g
- Protein: 2g
- Sugar: 10g
Keep in mind that these values are estimates, and they can vary based on the specific ingredients you use and the size of your pies. Enjoy your fried pies in moderation, and savor every bite!

Why You’ll Love Fried Pies
- Versatile Fillings: You can use just about any fruit you love! Whether it’s sweet apples, juicy peaches, or tangy cherries, the options are endless.
- Easy to Make: The process is straightforward and fun! With just a few simple steps, you can create a batch of delicious pies that are sure to impress.
- Perfect for Any Occasion: Fried pies are not just desserts; they make for delightful snacks, party treats, or even a sweet breakfast option!
- Comfort Food: There’s something nostalgic and heartwarming about biting into a warm, flaky fried pie that brings back memories of simpler times.
- Customizable: You can adjust the sweetness and spices to your liking, making each batch uniquely yours!
With fried pies, you really can’t go wrong. They’re sure to bring smiles and happy tummies to anyone lucky enough to enjoy them!
FAQ Section
Q1: Can I use frozen fruit for the filling?
Absolutely! Frozen fruit works just as well for making delicious fried pies. Just make sure to thaw and drain any excess liquid before cooking to avoid a soggy filling.
Q2: How do I prevent my pies from leaking during frying?
To keep your fried pies from leaking, ensure that you seal the edges well by crimping them with a fork. Also, avoid overfilling them—1–2 tablespoons of filling should be just right.
Q3: What is the best way to store leftover fried pies?
Leftover fried pies should be stored in an airtight container in the refrigerator. To reheat and restore their crispiness, pop them in a preheated oven for a few minutes. They’ll taste almost as good as fresh!
Q4: Can I make the dough ahead of time?
Yes, you can make the dough ahead of time! Just wrap it tightly in plastic wrap and refrigerate it for up to 2 days. When you’re ready to use it, let it sit at room temperature for a few minutes to soften slightly before rolling it out.
Q5: What other spices can I add to the filling?
You can get creative with spices! Besides cinnamon, try adding nutmeg or ginger for a warm, spicy kick. A little vanilla extract can also enhance the fruit flavor beautifully.
Storage & Reheating Instructions
To keep your leftover fried pies fresh and tasty, it’s best to store them in an airtight container in the refrigerator. This will help prevent them from getting soggy or losing their delightful crunch. They can be stored for up to 3 days, but trust me, they’ll be gone before then!
When you’re ready to enjoy those delicious treats again, reheating is key to maintaining that lovely texture. I find that popping them in a preheated oven at 350°F (175°C) for about 5–7 minutes works wonders. This method revives their crispiness, making them almost as good as when they were freshly fried! You can also use an air fryer if you have one—it’s fantastic for bringing back that golden, flaky crust. Enjoy your fried pies warm for the best experience!
For more recipes follow me in page Pinterest.
Print
Fried Pies: 7 Reasons They’ll Brighten Your Day
- Total Time: 1 hour
- Yield: 12 pies 1x
- Diet: Vegetarian
Description
Fried pies are a delightful treat filled with sweet fruit and encased in a flaky crust. Perfect for dessert or a snack.
Ingredients
- 2 ½ cups all-purpose flour
- 1 tablespoon granulated sugar
- ½ teaspoon salt
- 1 teaspoon baking powder
- ½ cup unsalted butter, cold, cut into small cubes
- ½ cup cold water (more if needed)
- 1 teaspoon vanilla extract (optional)
- 2 cups fresh or canned fruit (apples, peaches, or cherries), chopped
- ½ cup granulated sugar (adjust to taste)
- 1 tablespoon cornstarch
- 1 tablespoon lemon juice (optional)
- 1 teaspoon ground cinnamon (optional)
- Vegetable oil or sunflower oil for frying
- Powdered sugar, for dusting (optional)
Instructions
- In a large bowl, whisk together flour, sugar, salt, and baking powder.
- Add cold butter and cut it into the flour until the mixture resembles coarse crumbs.
- Stir in vanilla extract if using.
- Add cold water 1 tablespoon at a time, mixing just until the dough comes together.
- Turn dough onto a floured surface and knead gently until smooth. Do not overwork.
- Wrap in plastic wrap and refrigerate for 30 minutes.
- In a saucepan, combine fruit, sugar, cornstarch, lemon juice, and cinnamon.
- Cook over medium heat, stirring often, until thickened and the fruit is soft (about 10 minutes).
- Remove from heat and let cool slightly.
- Roll chilled dough on a floured surface to ⅛-inch thickness.
- Cut into 4–5 inch circles using a cutter or glass.
- Spoon 1–2 tablespoons of filling into the center of each circle.
- Fold dough over to form a half-moon.
- Press edges together and crimp with a fork to seal.
- Heat about 2 inches of oil in a deep skillet to 350°F (175°C).
- Fry pies in batches for 2–3 minutes per side, until golden brown.
- Remove and drain on paper towels.
- Let cool slightly and dust with powdered sugar if desired.
- Serve warm for best texture and flavor.
Notes
- Use any fruit you prefer for the filling.
- Adjust sugar based on the sweetness of the fruit.
- Ensure oil is hot enough before frying for a crispy crust.
- Prep Time: 30 minutes
- Cook Time: 30 minutes
- Category: Dessert
- Method: Frying
- Cuisine: American
Nutrition
- Serving Size: 1 pie
- Calories: 250
- Sugar: 10g
- Sodium: 100mg
- Fat: 10g
- Saturated Fat: 5g
- Unsaturated Fat: 3g
- Trans Fat: 0g
- Carbohydrates: 30g
- Fiber: 1g
- Protein: 2g
- Cholesterol: 20mg
Keywords: Fried Pies, Fruit Pies, Dessert, Snack