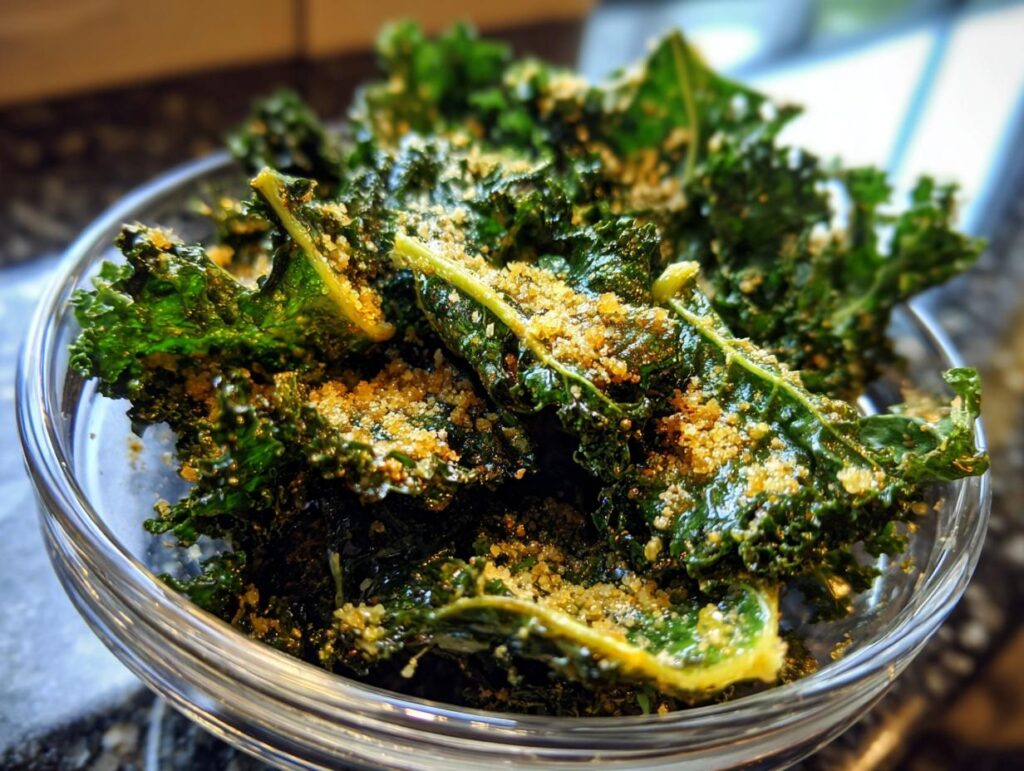
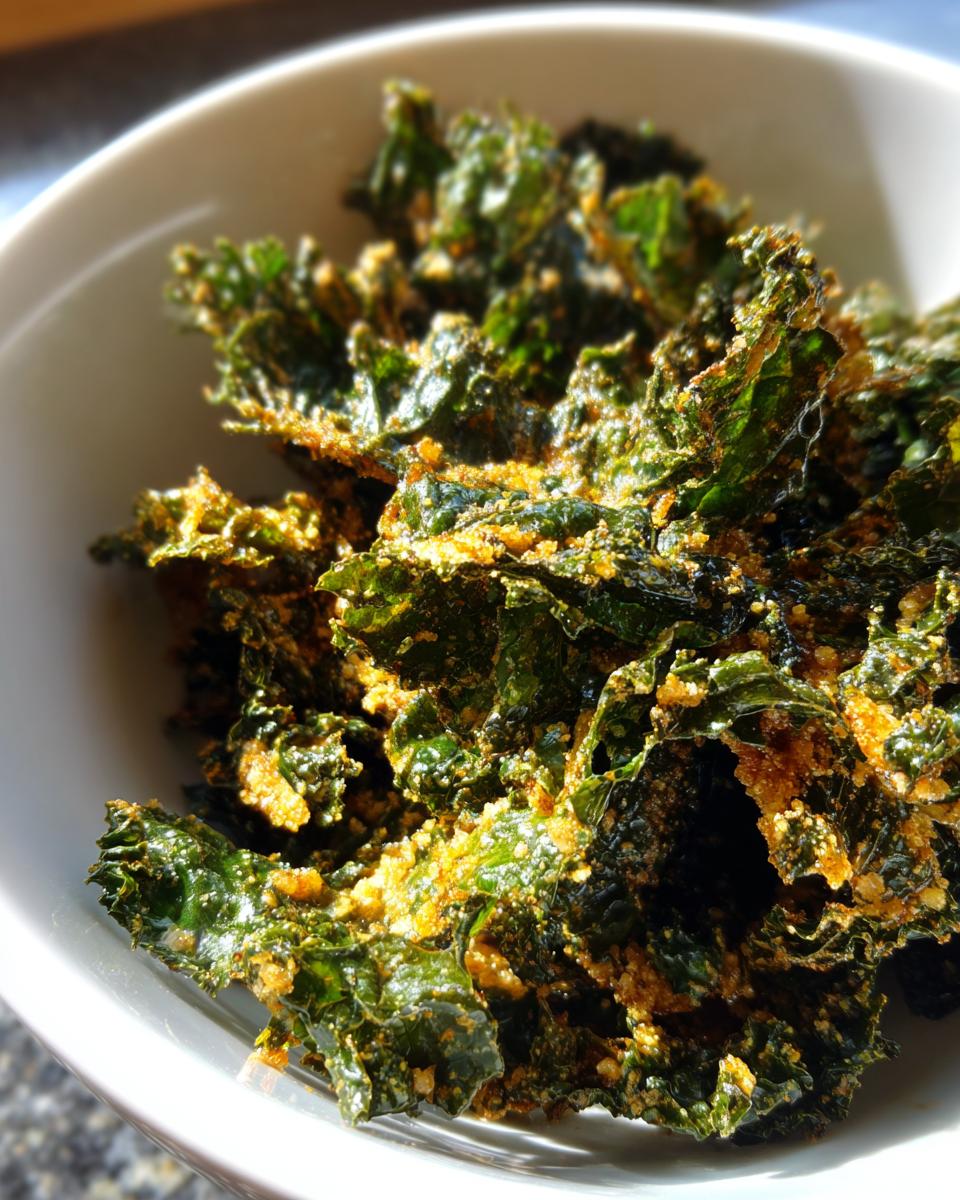
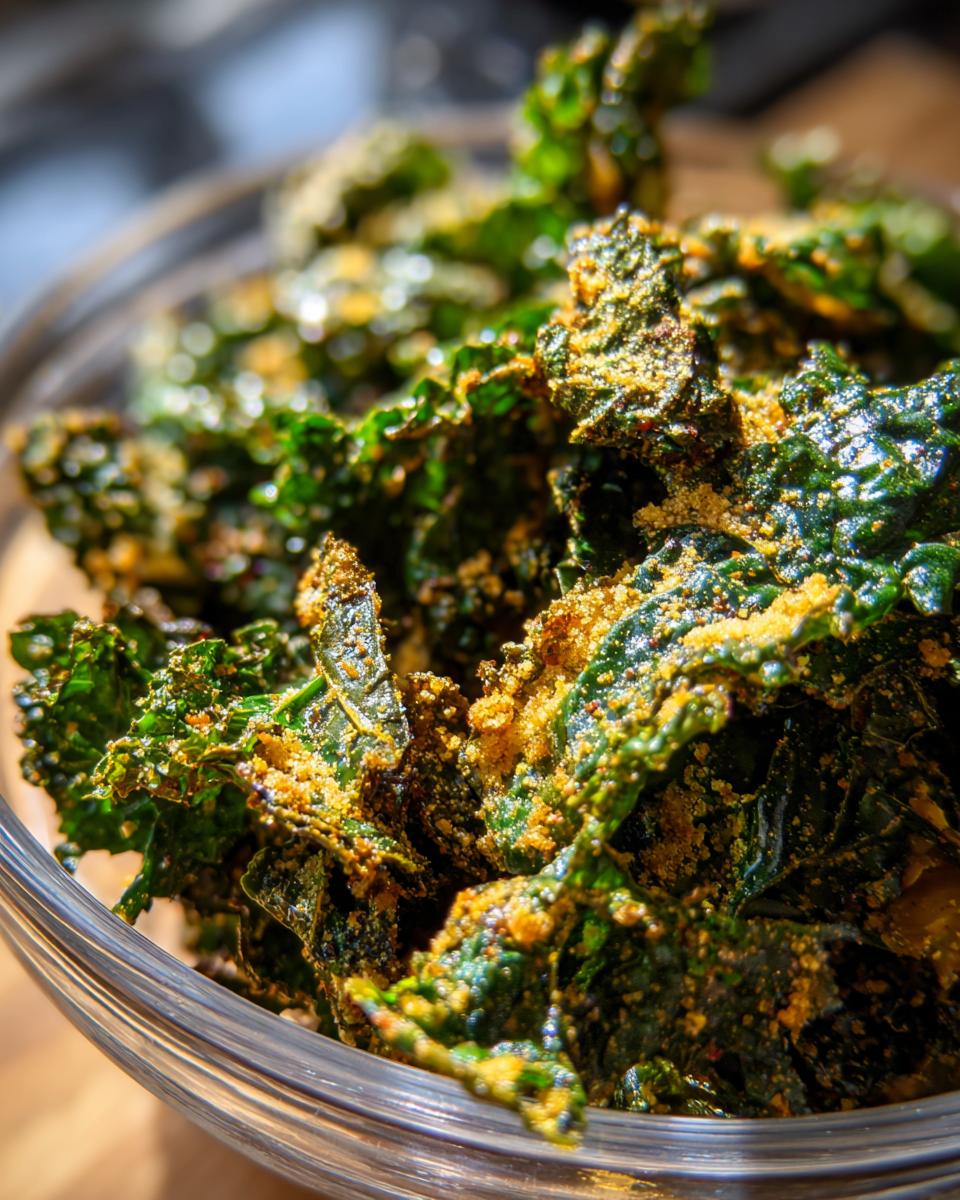
Oh, let me tell you about my absolute crush on Garlic and Parmesan Kale Chips! These little bites of crunchy goodness are not just a snack; they’re a game changer in the health department. Seriously, if you’ve ever thought kale was boring, think again! When you toss those vibrant green leaves with some olive oil, minced garlic, and a generous sprinkle of freshly grated Parmesan cheese, magic happens. The flavors meld together in a way that makes each chip utterly irresistible.
Not only are these chips delightfully crispy and packed with flavor, but they’re also a powerhouse of nutrients. Kale is loaded with vitamins A, C, and K, plus tons of antioxidants. It’s a snack you can feel good about indulging in! Plus, making your own Garlic and Parmesan Kale Chips is super easy and way healthier than any store-bought alternative. You get to control the ingredients, so you can really tailor it to your taste. Trust me, once you take that first crunchy bite, you’ll be hooked!
Ingredients List
- 1 bunch of fresh kale (washed and thoroughly dried, stems removed)
- 2 tablespoons extra virgin olive oil
- 2-3 cloves garlic (minced)
- 1/4 cup freshly grated Parmesan cheese
- 1/2 teaspoon sea salt (or to taste)
- 1/4 teaspoon black pepper (optional, for an extra kick)
How to Prepare Garlic and Parmesan Kale Chips
Step-by-Step Instructions
Alright, let’s dive into the fun part—making those Garlic and Parmesan Kale Chips! You’re going to love how easy this is. First things first, preheat your oven to 350°F (175°C). This is the ideal temperature for achieving that perfect crispiness!
Once your oven is heating up, grab your washed and dried kale. It’s super important to make sure it’s dry; otherwise, your chips will end up soggy. I like to use a salad spinner to get all the moisture out, but a clean kitchen towel works too. Just give those leaves a good pat.
Next, in a large mixing bowl, combine the kale pieces with the extra virgin olive oil. Make sure to toss them well, ensuring every leaf is lightly coated. This will help the kale crisp up nicely and allow the garlic and cheese to stick. Now, sprinkle in the minced garlic, sea salt, and black pepper if you’re using it. Toss everything together again until the kale is evenly seasoned. Wow, that aroma is going to get your taste buds excited!
Now for the fun part: spread the kale evenly on a baking sheet lined with parchment paper. Make sure to lay them out in a single layer—this is key to achieving that delightful crunch. If you crowd the pan, they’ll steam instead of crisp. Once you’ve got them arranged, sprinkle the freshly grated Parmesan cheese all over the kale.
Pop those beauties into your preheated oven and bake for about 10-15 minutes. Keep a close eye on them around the 10-minute mark! You want them to turn golden brown and crispy, but not burnt. If you hear a nice crunch when you tap the baking sheet, you’re on the right track!
Once they’re done, remove the baking sheet from the oven and let the chips cool for a minute. They’ll crisp up even more as they cool. Now, it’s time to dig in! Trust me, you won’t be able to stop at just one handful!
Tips for Success
Now that you’re ready to whip up some amazing Garlic and Parmesan Kale Chips, let me share my top tips to ensure they turn out perfectly every time!
Choosing the Right Kale
First things first, selecting fresh kale is crucial! Look for vibrant, deep green leaves that are crisp and free from any wilting or yellowing. I personally prefer using curly kale for its texture, but lacinato (or dinosaur) kale works great too! Just make sure it’s young and tender; older kale can be tough and a bit bitter.
Avoiding Sogginess
One of the biggest pitfalls when making kale chips is ending up with soggy leaves. Ensure your kale is thoroughly dried after washing. I can’t stress this enough! If you’re using a salad spinner, give it a good spin, and then use a towel to pat them dry. If there’s moisture left, the chips won’t crisp up properly.
The Right Amount of Oil
When it comes to oil, less is more! You want just enough to coat the leaves lightly. If you overdo it, they can end up greasy instead of crispy. A good rule of thumb is about 2 tablespoons for a whole bunch of kale. Toss those leaves gently to ensure even coverage without drowning them.
Spacing is Key
When spreading the kale on your baking sheet, give each piece some breathing room. Lay them out in a single layer, and avoid overcrowding the pan. If they’re too close together, they’ll steam rather than bake, and you definitely want that satisfying crunch!
Keep an Eye on Them
Lastly, don’t walk away from the oven! Check on your kale chips around the 10-minute mark. Ovens can vary, and you want to catch them just as they turn golden brown and crispy. If you hear that delightful crunch as you tap the pan, you’re golden!
With these tips in your back pocket, you’re all set to create the ultimate Garlic and Parmesan Kale Chips that will leave everyone wanting more. Happy snacking!
Nutritional Information Disclaimer
Before you dive into your delicious batch of Garlic and Parmesan Kale Chips, I want to share a quick note about the nutritional information. Keep in mind that nutrition can vary based on the specific ingredients and brands you choose to use. So, while I can provide some estimated values, they won’t be exact for every preparation.
Generally speaking, you can expect these tasty chips to be low in calories and rich in nutrients, but your actual numbers may differ. Typically, estimated nutritional values can include calories, fat, protein, carbohydrates, and fiber. Always feel free to adjust based on your preferences or dietary needs!
So, while you enjoy these crispy delights, remember that they’re not just tasty—they’re also a great way to sneak in some healthy greens!
FAQ Section
Can I store leftover Garlic and Parmesan Kale Chips?
Absolutely! If you happen to have any leftovers (which is rare in my house!), you can store them in an airtight container at room temperature for up to 2 days. Just be aware that they tend to lose their crispiness over time. If you want to refresh them, pop them back in the oven for a few minutes to re-crisp!
What variations can I try with Garlic and Parmesan Kale Chips?
Oh, there are so many fun ways to jazz these up! You can experiment with different spices like paprika, cayenne, or even nutritional yeast for a cheesy flavor without the dairy. If you’re feeling adventurous, try adding lemon zest for a fresh twist or mixing in some crushed red pepper flakes for a kick! The possibilities are endless!
What should I do if my kale chips are soggy?
If you find yourself with soggy kale chips, it usually comes down to one of two things: too much moisture or overcrowding on the baking sheet. Make sure your kale is thoroughly dried before seasoning, and spread them out in a single layer to allow for even baking. If they still turn out soggy, you can always toss them back in the oven for a few more minutes to help them crisp up!
Can I make these chips in an air fryer?
You bet! An air fryer is perfect for making crispy kale chips. Just toss your seasoned kale with the same ingredients, then place them in the air fryer basket in a single layer. Cook them at 300°F (150°C) for about 5-7 minutes, shaking the basket halfway through. Keep an eye on them, as air fryers can vary in cooking time!
What’s the best way to enjoy Garlic and Parmesan Kale Chips?
These chips are delicious on their own, but they also make a fantastic topping for salads, soups, or grain bowls. You can even serve them alongside your favorite dip, like hummus or guacamole, for a delightful crunch. Trust me, once you start snacking, you’ll find new ways to incorporate them into your meals!
Why You’ll Love This Recipe
Let me tell you, you’re going to fall head over heels for these Garlic and Parmesan Kale Chips! First off, they’re the perfect quick snack. Whether you need something to munch on while binge-watching your favorite show or a crunchy pick-me-up during the day, these chips will satisfy that craving without any guilt.
And can we talk about how healthy they are? Kale is packed with vitamins and antioxidants, making these chips not just tasty but also a fantastic alternative to traditional snacks. You get all the crunch and flavor without the added preservatives and calories found in store-bought chips. How awesome is that?
Plus, making your own Garlic and Parmesan Kale Chips is super easy! With just a handful of simple ingredients and a few minutes of prep time, you’ll have a delicious snack ready to go. You have total control over how much garlic and cheese you want to add, so you can customize it to fit your taste perfectly!
Trust me, once you give these a try, you’ll be whipping up batches on a regular basis. They’re not just a snack; they’re a game changer in your kitchen!
Equipment Needed
Before you get started on your Garlic and Parmesan Kale Chips, let’s gather the essential tools you’ll need. Don’t worry, you won’t need any fancy gadgets—just some simple kitchen items that I’m sure you already have!
- Baking Sheet: A standard baking sheet is perfect for spreading out your kale. I’m a big fan of using two sheets at once to speed up the process if you have a lot of kale!
- Parchment Paper: This is optional, but lining your baking sheet with parchment paper makes clean-up a breeze and helps prevent sticking.
- Mixing Bowl: You’ll need a large mixing bowl to toss your kale with the olive oil, garlic, and Parmesan. A big bowl gives you room to get in there and mix things up without making a mess!
- Measuring Spoons: Accurate measurements of oil and seasonings are essential for the best flavor, so grab your measuring spoons.
- Salad Spinner or Kitchen Towel: If you want perfectly dry kale, a salad spinner is fantastic for removing excess water after washing. A clean kitchen towel works just as well for patting the leaves dry!
- Knife or Kitchen Scissors: You’ll want these to remove the kale stems and chop the leaves into bite-sized pieces. I often use kitchen scissors, as they make it quick and easy!
With these items on hand, you’re all set to create your delicious Garlic and Parmesan Kale Chips. Let’s get cooking!
Serving Suggestions
Alright, now that you’ve made your irresistible Garlic and Parmesan Kale Chips, let’s talk about how to serve them up for maximum enjoyment! While they’re absolutely tasty on their own, pairing them with the right dips or beverages can elevate your snacking experience to a whole new level!
First off, if you’re looking for a dip that complements the flavors beautifully, I highly recommend serving your kale chips with a creamy hummus. The smooth texture and rich flavor of hummus balance the crunchiness of the chips perfectly. You could also whip up a simple garlic yogurt dip by mixing plain yogurt with a bit of lemon juice, minced garlic, and a sprinkle of herbs. It’s refreshing and adds a nice zing!
If you want something a little more indulgent, try a homemade guacamole! The creamy avocado pairs wonderfully with the crispy kale, and you can even add some chopped tomatoes or onions for an extra kick. Trust me, this combo is a crowd-pleaser!
Now, let’s talk beverages. These kale chips make a fantastic snack to enjoy with a crisp, cold beverage. A chilled sparkling water with a slice of lemon or lime can really refresh your palate. If you’re in the mood for something a bit more substantial, a light beer or a crisp white wine would work beautifully too!
And don’t forget, you can sprinkle these kale chips over salads or grain bowls for an added crunch! They’re not just a snack; they’re a versatile topping that can enhance your meals. So, get creative and enjoy your Garlic and Parmesan Kale Chips in all sorts of delicious ways!
For more recipes follow me in page Facebook and Pinterest.
Print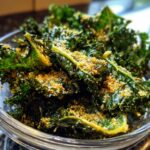
Garlic and Parmesan Kale Chips: 5 Irresistible Crunchy Bites
- Total Time: 2 hours 23 minutes
- Yield: 2 loaves 1x
- Diet: Vegetarian
Description
Homemade Bread is a simple and delicious recipe for fresh bread made with basic ingredients.
Ingredients
- 2 cups warm water (105–115°F / 474 g)
- 1 tablespoon active dry yeast
- 1/4 cup honey or sugar (85 g honey or 50 g sugar)
- 2 teaspoons salt
- 2 tablespoons oil (canola or vegetable, 30 ml)
- 4–5 1/2 cups all-purpose or bread flour (500–688 g)
Instructions
- In a large bowl or stand mixer, combine yeast, warm water, and a pinch of sugar/honey. Let rest 5–10 minutes until foamy.
- Add remaining sugar/honey, salt, oil, and 3 cups of flour. Mix to combine.
- Add another cup of flour and mix. Gradually add remaining flour, 1/2 cup at a time, until dough is smooth, elastic, and slightly sticky to touch.
- Mix on medium speed for 4–5 minutes or knead by hand 5–8 minutes on lightly floured surface.
- Grease a large bowl and place dough inside, turning to coat. Cover and let rise in a warm place until doubled, about 1 ½ hours.
- Spray two 9×5-inch bread pans with cooking spray. Punch down dough to remove air bubbles. Divide into two portions and shape into long logs. Place in prepared pans.
- Cover pans lightly and allow dough to rise 45–60 minutes, or until dough rises ~1 inch above pans.
- Preheat oven to 350°F (175°C). Bake 30–33 minutes, until golden brown. Tap top of loaf; it should sound hollow.
- Invert loaves onto a wire rack. Brush tops with butter. Cool at least 10 minutes before slicing.
Notes
- Flour: Bread flour = chewier loaf. Whole wheat requires a different recipe.
- Yeast: Instant/Rapid Rise yeast can skip proofing; rise times will be faster.
- Quick-rise tip: Use warm (180°F) oven, turned off, with slightly cracked door to speed first rise.
- Make-ahead: Complete steps 1–4, refrigerate dough up to 1 day before first rise.
- Freezing: Dough can be frozen before second rise up to 3 months; thaw, rise, then bake. Baked bread can be frozen up to 3 months. Thaw before slicing.
- Bread machine: Reduce recipe by half for 1 loaf if needed.
- Prep Time: 20 minutes
- Cook Time: 33 minutes
- Category: Bread
- Method: Baking
- Cuisine: American
Nutrition
- Serving Size: 1 slice
- Calories: 202
- Sugar: 3 g
- Sodium: 196 mg
- Fat: 2 g
- Saturated Fat: 1 g
- Carbohydrates: 41 g
- Fiber: 1 g
- Protein: 5 g
Keywords: Homemade Bread, Bread Recipe, Baking Bread