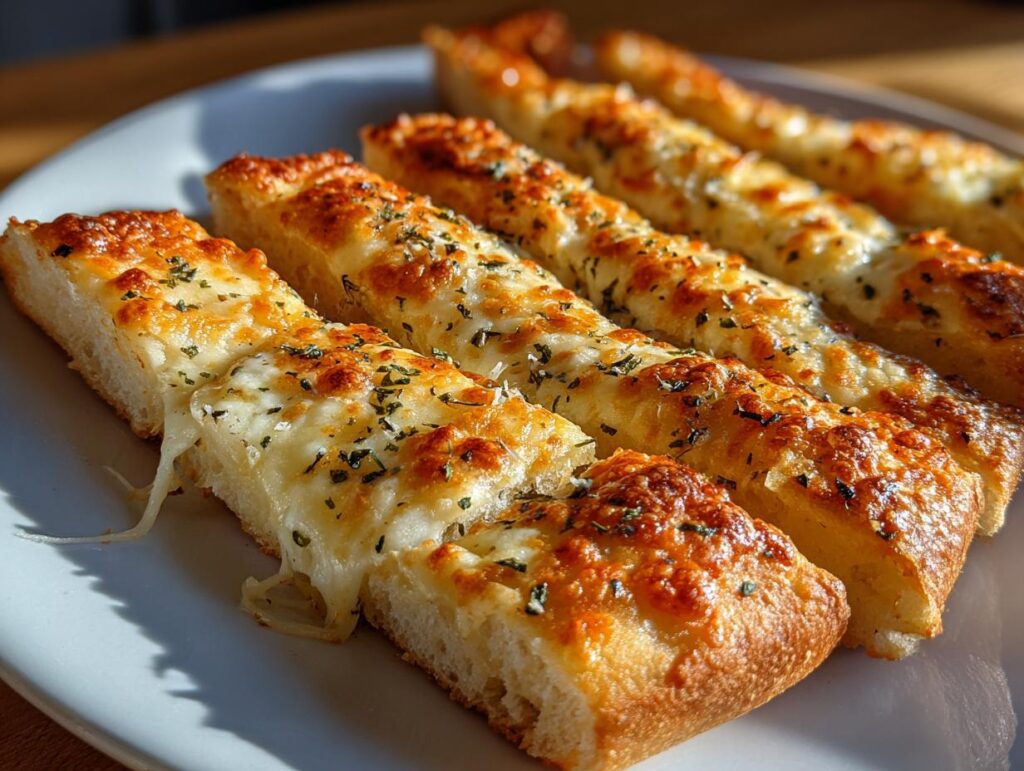
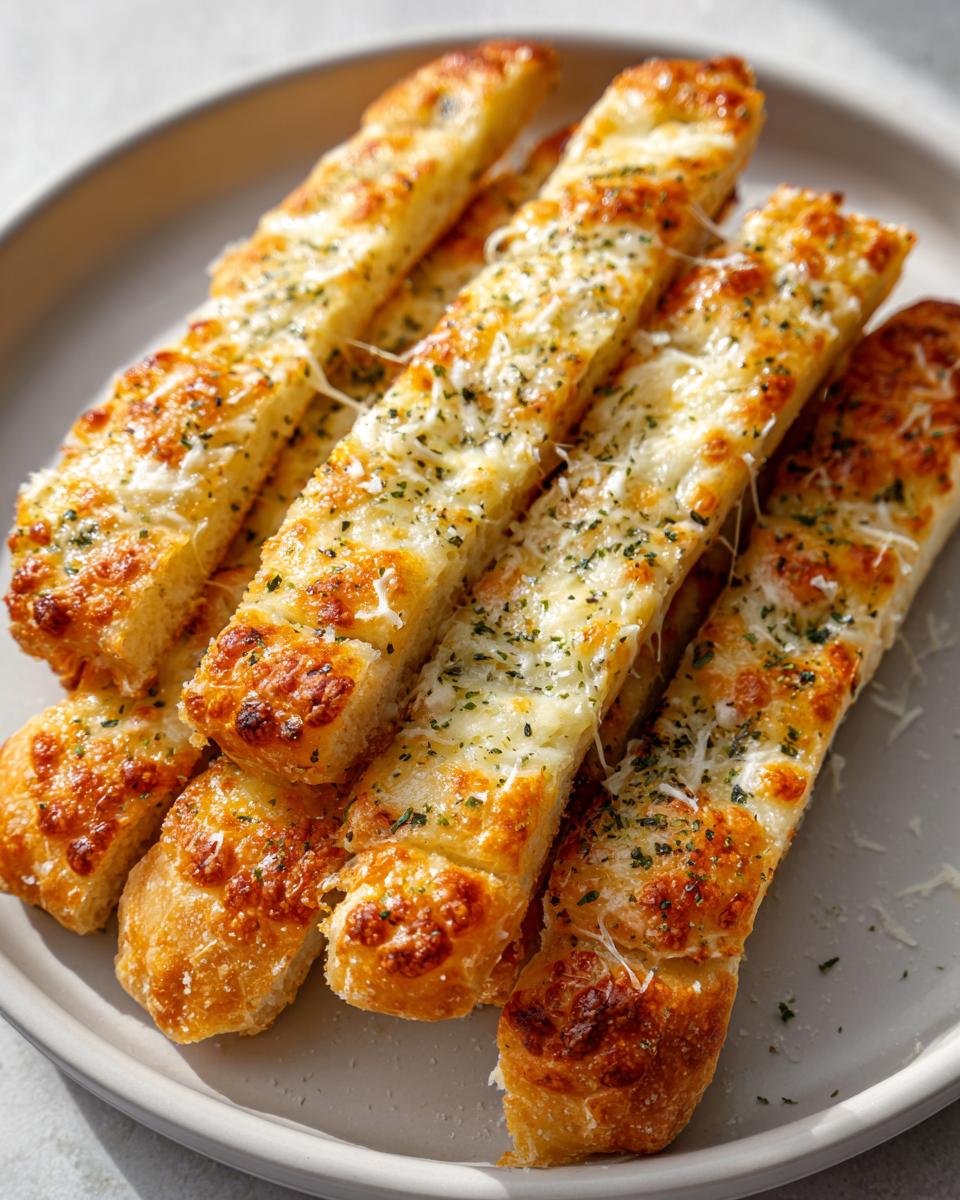
There’s something truly magical about the smell of garlic wafting through the kitchen. I remember my first time making Homemade Cheesy Garlic Breadsticks—the excitement was palpable! It was a cozy Friday night, and I wanted to whip up something fun to enjoy while we binge-watched our favorite shows. I grabbed a tube of refrigerated pizza crust and got to work, and let me tell you, it turned out to be a total game changer.
This recipe is so quick and easy that anyone can make it, even if you’re not exactly a pro in the kitchen. In just about 22 minutes from start to finish, you can have golden, cheesy, garlic-infused breadsticks that are perfect for any occasion—whether it’s a family dinner, a movie night, or a casual get-together with friends. Trust me, once you pull these out of the oven, the compliments will come pouring in! Plus, they’re super customizable, so you can load on the cheese or sprinkle in your favorite herbs. Who wouldn’t love that?
Ingredients for Homemade Cheesy Garlic Breadsticks Recipe
Let’s gather everything you need to create these delightful Homemade Cheesy Garlic Breadsticks. It’s all about simplicity and flavor! Here’s what you’ll need:
- 1 tube refrigerated pizza crust: This is the base for our breadsticks. It’s super convenient and perfect for a quick prep!
- 1 tablespoon butter, melted: This adds a rich flavor and helps the garlic stick to the crust.
- 1 clove garlic, crushed: Fresh garlic is a must for that aromatic punch. Just give it a good crush to release all those flavors.
- 3/4 cup grated mozzarella cheese: You can never have too much cheese! Feel free to add more if you’re like me and love it cheesy.
- 1 tablespoon Parmesan cheese: For that extra depth of flavor, Parmesan is a game changer.
- 1 teaspoon dried oregano (optional): A sprinkle of oregano adds a lovely herbal note. If you have fresh herbs, even better!
Make sure you have everything ready before you start; it makes the process so much smoother and more enjoyable. Trust me, you’ll want to savor every cheesy bite of these breadsticks!
How to Prepare Homemade Cheesy Garlic Breadsticks
Preheat and Prepare
First things first, you’ll want to preheat your oven to 425°F (220°C). This step is crucial for achieving that perfectly baked crust. While the oven is warming up, line a baking sheet with parchment paper. This will not only help with easy cleanup but also ensure your breadsticks come off the pan without any hassle. I always find that the parchment gives them that little extra crispiness, which is just divine!
Roll Out the Pizza Crust
Once your oven is preheated, grab that tube of refrigerated pizza crust and roll it out onto the prepared baking sheet. I like to unroll it gently and then use my hands to stretch it out evenly, ensuring it covers the whole sheet. Don’t worry if it doesn’t look perfect—those rustic edges just add charm! Aim for about a quarter-inch thickness so it bakes evenly and gets that lovely golden color.
Prepare the Garlic Butter Mixture
Now for the fun part! In a small bowl, mix together your melted butter and crushed garlic. This mixture is what makes your breadsticks sing with flavor! Use a brush to evenly coat the surface of the rolled-out pizza crust with the garlic butter. Make sure you get every bit of that delicious garlic goodness on there. You’ll be amazed at how aromatic your kitchen smells—trust me, it’s heavenly!
Add the Cheeses and Seasoning
Next, sprinkle your grated mozzarella cheese generously over the crust. Go ahead and pile it on; if you’re anything like me, you can never have too much cheese! After that, add the Parmesan cheese for that extra flavor kick, followed by a sprinkle of dried oregano if you’re using it. This little touch elevates the entire dish, giving it that authentic Italian vibe. Just picture it: warm, cheesy, and oh-so-inviting!
Cutting and Baking
Before popping your breadsticks into the oven, take a pizza cutter or a sharp knife and cut the topped crust into 16 equal rectangles. This makes it easy to grab after baking—trust me, you’ll want to dive in as soon as they’re out! Bake them in your preheated oven for about 12 minutes, or until the cheese is melted, bubbly, and lightly golden. Keep an eye on them because every oven is a little different!
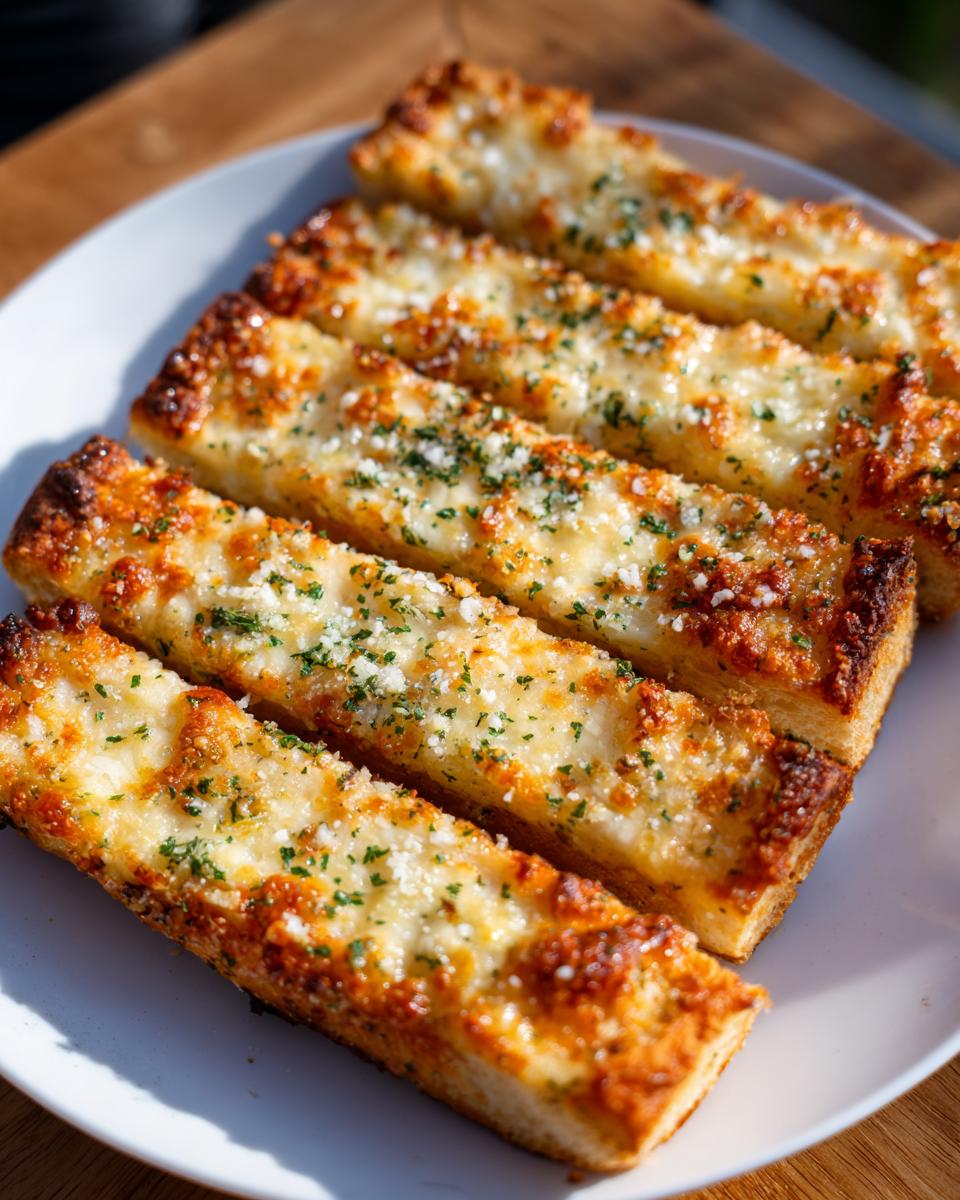
Serving Suggestions
Once they’re out of the oven, let your cheesy garlic breadsticks cool for just a minute. Then, cut them again along the same lines you made before baking. This will ensure they break apart easily. Serve them warm, straight from the oven, for the best experience. Grab some marinara sauce for dipping if you like! These breadsticks are the perfect appetizer or snack, and everyone will be asking for seconds!
Why You’ll Love This Recipe
- Quick Preparation: You can whip these up in just 22 minutes, making them a perfect choice for last-minute cravings or unexpected guests!
- Delicious Flavor: The combination of garlic, melted cheese, and buttery crust creates an irresistible flavor that will have everyone coming back for more.
- Perfect for Gatherings: These cheesy garlic breadsticks are a hit at any gathering, whether it’s a cozy family dinner or a lively game night with friends.
- Customizable: Feel free to experiment! You can swap out mozzarella for your favorite cheese, or add fresh herbs for a personal touch that suits your taste.
Tips for Success
Want to elevate your Homemade Cheesy Garlic Breadsticks to the next level? I’ve got some pro tips that’ll ensure your breadsticks turn out perfect every time!
- Cheese Adjustments: If you’re a cheese lover like me, don’t hesitate to increase the mozzarella to 1–1½ cups for that extra gooey goodness! Just keep in mind that more cheese may require a minute or two more in the oven to melt perfectly.
- Herb Alternatives: While dried oregano is a classic, feel free to swap it out for dried parsley or dried basil if you prefer. Fresh herbs can also make a delightful difference—chop up some fresh basil or parsley and sprinkle it on right before serving for a burst of flavor!
- Experiment with Garlic: Want a bolder garlic flavor? Try adding an extra clove or two! If you’re feeling adventurous, roasted garlic can also be a fantastic option; it adds a lovely sweetness that pairs beautifully with the cheese.
- Storage Tips: If you happen to have leftovers (which is rare in my house!), store them in an airtight container in the fridge. Just pop them in the oven for a few minutes to reheat, and they’ll be as delicious as fresh out of the oven!
- Pairing Suggestions: These breadsticks are fantastic on their own, but they shine even brighter when served with a side of marinara or garlic dipping sauce. Trust me, it takes them to a whole new level!
With these tips, you’ll be well on your way to making the ultimate cheesy garlic breadsticks that everyone will rave about. Enjoy the cheesy goodness!
Nutritional Information
Getting the deliciousness of Homemade Cheesy Garlic Breadsticks is great, but it’s also nice to know what you’re indulging in! Here’s a breakdown of the typical nutritional values per serving (1 breadstick). Keep in mind that these are estimates, but they give you a good idea of what to expect:
- Calories: 110
- Fat: 5 g
- Saturated Fat: 2 g
- Unsaturated Fat: 3 g
- Trans Fat: 0 g
- Sodium: 190 mg
- Carbohydrates: 11 g
- Fiber: 0 g
- Sugar: 1 g
- Protein: 4 g
- Cholesterol: 10 mg
This delightful snack fits perfectly into a balanced diet, especially when shared with family and friends. So feel free to enjoy these cheesy bites without a worry! Just remember, everything in moderation is the key to happiness in the kitchen and beyond!
FAQ About Homemade Cheesy Garlic Breadsticks
Got questions about making your Homemade Cheesy Garlic Breadsticks? I’ve got you covered! Here are some common queries that pop up, along with my best answers to help you create the perfect cheesy treat.
How do I store leftover breadsticks?
If you happen to have some leftover breadsticks (which, let’s be honest, is pretty rare), the best way to store them is in an airtight container in the fridge. This keeps them fresh for a couple of days. Just remember to reheat them in the oven for a few minutes when you want to enjoy them again—this helps restore that lovely crispiness!
Can I freeze these cheesy garlic breadsticks?
Absolutely! These breadsticks freeze wonderfully. Just let them cool completely after baking, then wrap them tightly in plastic wrap or aluminum foil before placing them in a freezer-safe bag. When you’re ready to indulge, thaw them in the fridge overnight and reheat in the oven for that fresh-out-of-the-oven taste.
What can I use instead of pizza crust?
If you want to switch things up, you can absolutely use other types of dough! For instance, crescent roll dough or even homemade bread dough can work well. Just keep in mind that baking times might vary slightly, so keep an eye on them as they bake!
How can I make these breadsticks spicier?
If you’re a fan of heat, consider adding some red pepper flakes to your garlic butter mixture or even mixing in a bit of hot sauce with the melted butter. You can also experiment with pepper jack cheese instead of mozzarella for an extra kick!
Can I use fresh garlic instead of crushed garlic?
Oh, for sure! Fresh garlic is actually ideal for this recipe. Just make sure to finely mince it if you’re using fresh cloves. You want that intense garlic flavor to permeate the breadsticks, so don’t hold back!
Are these breadsticks vegetarian-friendly?
You bet! This Homemade Cheesy Garlic Breadsticks Recipe is vegetarian as it contains no meat products. If you’re catering to specific dietary preferences, just be sure to check the cheese brands for any non-vegetarian rennet, though most common brands are fine!
If you have any more questions or need tips, don’t hesitate to reach out! I love hearing from fellow home cooks and sharing the cheesy goodness that is these breadsticks!
Leave Your Feedback
I’d absolutely love to hear your thoughts on my Homemade Cheesy Garlic Breadsticks Recipe! If you tried it out, please take a moment to leave a comment below and share your experience. Did you add any personal touches? How did your breadsticks turn out? Your feedback not only makes my day but also helps other fellow home cooks find joy in this recipe!
If you enjoyed making these cheesy delights, consider giving the recipe a rating! It really helps me know what you all love, and it’s a fantastic way to support this little corner of my culinary journey.
And hey, if you’re feeling social, snap a photo of your cheesy garlic breadsticks and share it on social media. Tag me so I can see your delicious creations! I can’t wait to celebrate your baking triumphs together. Happy cooking, friends!
For more recipes follow me in page Pinterest.
Print
Homemade Cheesy Garlic Breadsticks Recipe: 22 Minutes to Bliss
- Total Time: 22 minutes
- Yield: 16 breadsticks 1x
- Diet: Vegetarian
Description
Homemade Cheesy Garlic Breadsticks Recipe
Ingredients
- 1 tube refrigerated pizza crust
- 1 tablespoon butter, melted
- 1 clove garlic, crushed
- 3/4 cup grated mozzarella cheese (or more, to taste)
- 1 tablespoon Parmesan cheese
- 1 teaspoon dried oregano (optional)
Instructions
- Preheat the oven to 425°F (220°C). Line a baking sheet with parchment paper.
- Roll out the pizza crust evenly on the prepared baking sheet.
- Mix the melted butter with the crushed garlic and brush evenly over the crust.
- Sprinkle mozzarella and Parmesan evenly over the crust, then add oregano if using.
- Before baking, cut the topped crust into 16 equal rectangles using a pizza cutter or knife.
- Bake for about 12 minutes, until the cheese is melted, bubbly, and lightly golden.
- Remove from the oven and cut again along the same lines before serving.
Notes
- For extra cheesy breadsticks, increase the mozzarella to 1–1½ cups.
- Dried parsley or dried basil can be used instead of oregano.
- Best enjoyed warm, straight from the oven.
- Prep Time: 10 minutes
- Cook Time: 12 minutes
- Category: Appetizer
- Method: Baking
- Cuisine: Italian
Nutrition
- Serving Size: 1 breadstick
- Calories: 110
- Sugar: 1 g
- Sodium: 190 mg
- Fat: 5 g
- Saturated Fat: 2 g
- Unsaturated Fat: 3 g
- Trans Fat: 0 g
- Carbohydrates: 11 g
- Fiber: 0 g
- Protein: 4 g
- Cholesterol: 10 mg
Keywords: Cheesy Garlic Breadsticks, Homemade Breadsticks, Pizza Crust Recipe