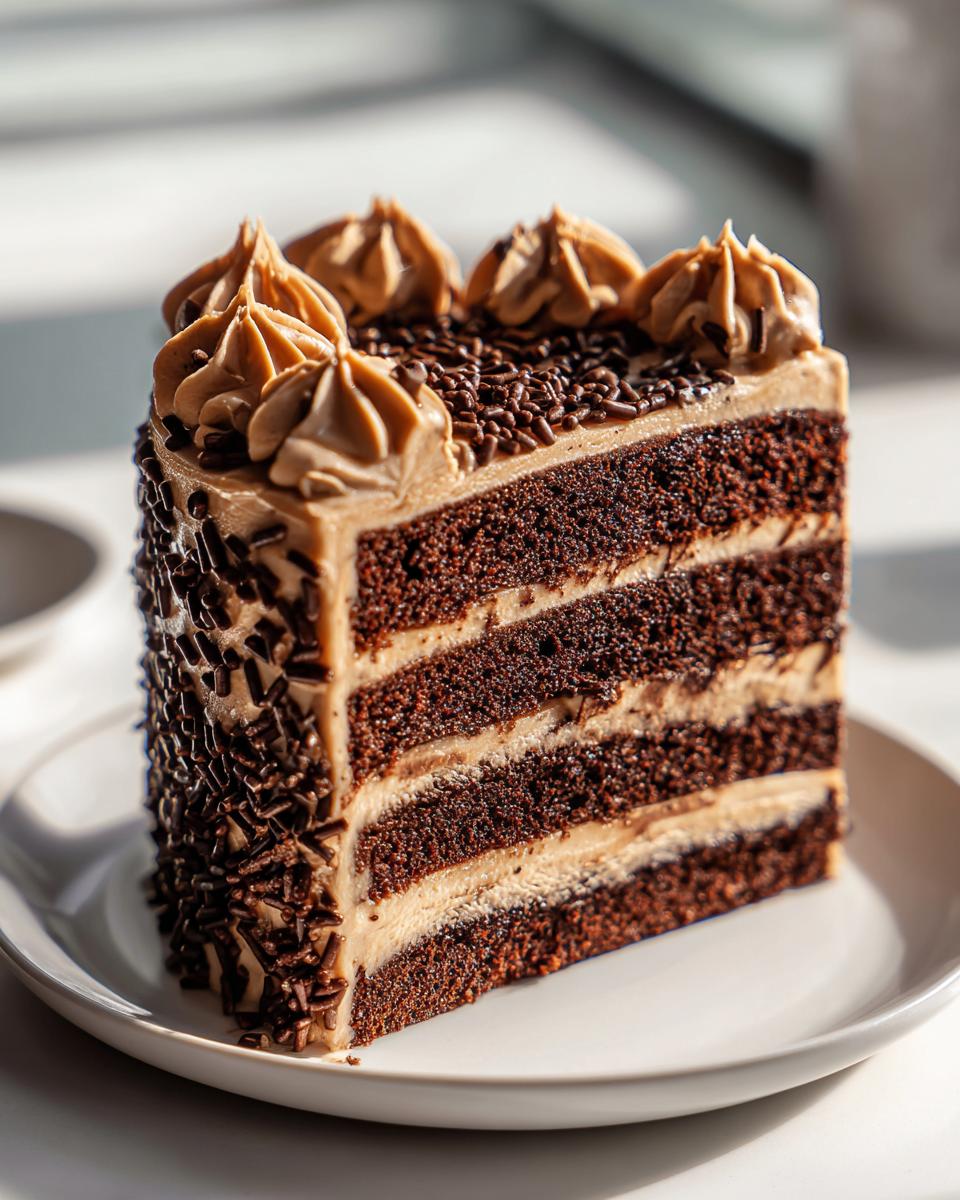
Oh my goodness, let me tell you about my absolute favorite dessert: Kahlua Coffee Chocolate Layer Cake! This cake is a showstopper, both in flavor and appearance. I remember the first time I made it for my best friend’s birthday party. The moment I pulled it out of the oven, the rich aroma of chocolate and coffee filled the entire house, and I couldn’t wait to dig into it. As the layers came together, I could already envision the delight on everyone’s faces when they took their first bite.bn
This cake is a delightful fusion of deep, chocolatey goodness paired with a luscious coffee frosting that just takes it over the top. The Kahlua adds a little kick, making it an indulgent treat that’s perfect for special occasions or just a cozy night in. Trust me, it’s the kind of cake that makes you feel like a baking superstar, even if you’re just a home cook like me! With its moist layers and rich flavors, it’s sure to impress anyone who gets a slice. So grab your apron, and let’s get ready to make some magic in the kitchen!
Oh my goodness, let me tell you about my absolute favorite dessert: Kahlua Coffee Chocolate Layer Cake! This cake is a showstopper, both in flavor and appearance. I remember the first time I made it for my best friend’s birthday party. The moment I pulled it out of the oven, the rich aroma of chocolate and coffee filled the entire house, and I couldn’t wait to dig into it. As the layers came together, I could already envision the delight on everyone’s faces when they took their first bite.
This cake is a delightful fusion of deep, chocolatey goodness paired with a luscious coffee frosting that just takes it over the top. The Kahlua adds a little kick, making it an indulgent treat that’s perfect for special occasions or just a cozy night in. Trust me, it’s the kind of cake that makes you feel like a baking superstar, even if you’re just a home cook like me! With its moist layers and rich flavors, it’s sure to impress anyone who gets a slice. So grab your apron, and let’s get ready to make some magic in the kitchen!
Ingredients for Kahlua Coffee Chocolate Layer Cake
To whip up this delightful Kahlua Coffee Chocolate Layer Cake, you’ll need the following ingredients:
- 2 cups (260g) all-purpose flour
- 2 cups (414g) granulated sugar
- 3/4 cup (85g) natural unsweetened cocoa powder
- 2 teaspoons baking soda
- 1 teaspoon salt
- 3 large eggs
- 3/4 cup (180ml) milk
- 1 cup (240ml) vegetable oil
- 1/2 cup (120ml) strong brewed coffee (you can swap this with Kahlua for a richer flavor)
- 1 teaspoon vanilla extract
- 3/4 cup (180ml) hot coffee
- 3 tablespoons instant espresso powder
- 1 1/2 cups (336g) unsalted butter, at room temperature
- 1 1/4 cups (236g) shortening
- 10 1/4 cups (1208g) powdered sugar
- Chocolate jimmie sprinkles for decoration
Take a moment to gather these ingredients, and you’ll be on your way to creating a cake that’s not just a treat, but a memorable experience. Enjoy the process; it’s all part of the fun!
How to Prepare Kahlua Coffee Chocolate Layer Cake
Now that you’ve got all your ingredients ready, let’s dive into the steps to create this luscious Kahlua Coffee Chocolate Layer Cake! I promise, it’s easier than it looks, and the end result is worth every moment spent in the kitchen.
Preparing the Cake
First things first, preheat your oven to 300°F (148°C). This might seem low, but trust me, it helps keep the cake moist and gives it that perfect texture. While the oven is warming up, grease three 8-inch cake pans and line the bottoms with parchment circles. This little trick ensures your layers come out smoothly without any fuss!
In a large mixing bowl, combine all the dry ingredients: flour, sugar, cocoa powder, baking soda, and salt. Give it a good whisk to blend everything together. Next, add in the eggs, milk, vegetable oil, strong brewed coffee, and vanilla extract. Now, mix everything well until it’s smooth and combined.
Here comes the fun part—pour in the hot coffee! This will make your batter thin, but don’t worry, that’s exactly what you want. Just give it one last mix until everything’s fully incorporated.
Baking the Cake
Now, it’s time to divide the batter evenly between your three prepared cake pans. You want to get them as equal as possible for even baking. Pop them into the oven for about 32 to 35 minutes. Keep an eye on them, and check for doneness by inserting a toothpick into the center—if it comes out with a few moist crumbs, you’re golden! If it’s wet with batter, let it bake a little longer.
Once they’re done, take the cakes out and let them cool in the pans for about 5 minutes. Then, carefully transfer them to cooling racks to cool completely. Patience is key here—don’t rush the cooling process, or you risk a messy frosting situation!
Making the Frosting
While your cakes are cooling, let’s whip up that delicious frosting! Start by dissolving the instant espresso powder in a small amount of hot water—this step really amps up the coffee flavor in the frosting. Set it aside to cool slightly.
In a large mixing bowl, beat the unsalted butter and shortening together until it’s smooth and creamy. Gradually add in half of the powdered sugar, mixing until smooth. Then, pour in half of your cooled espresso mixture and mix again. Repeat this process with the remaining powdered sugar and espresso until you achieve a frosting that’s spreadable but still holds its shape. If it’s too thick, just add a splash of milk to loosen it up.
Assembling the Cake
Once your cakes have cooled completely, it’s time for the fun part—assembling your masterpiece! Start by leveling the tops of each cake layer with a serrated knife if they’ve domed up. Place the first layer on your serving plate and spread about 1 cup of frosting evenly on top. Repeat this with the second layer, adding frosting again.
Now, place the final layer on top and it’s time to frost the outside of the cake! Use the remaining frosting to coat the sides and top smoothly. If you’re feeling fancy, grab an icing comb to create a beautiful pattern on the sides.
As a finishing touch, press some chocolate jimmie sprinkles into the bottom edges of the cake and pipe some swirls on top for extra flair. Your Kahlua Coffee Chocolate Layer Cake is now ready to dazzle and delight!
Tips for Success with Kahlua Coffee Chocolate Layer Cake
So, you’re ready to bake this fabulous Kahlua Coffee Chocolate Layer Cake? Awesome! Here are some of my top tips to ensure that your cake turns out perfect every single time. Trust me; these little nuggets of wisdom can make a big difference!
Ingredient Temperature Matters
First off, make sure your ingredients are at room temperature. This means your eggs, butter, and shortening should be soft but not melted. Room temp ingredients mix together better, creating a smoother batter and a more tender cake. I usually take them out of the fridge about 30 minutes before I start baking. It makes a world of difference!
Mixing Techniques
Don’t rush the mixing process! When you’re combining your butter and sugar, really take the time to cream them together until the mixture is light and fluffy. This step is crucial as it introduces air into the batter, contributing to a lighter cake. And when you’re adding in the dry and wet ingredients, remember to alternate them. Start and finish with the dry ingredients to help keep that perfect texture!
Check Your Oven Temperature
Ovens can be sneaky sometimes! If you have an oven thermometer, I highly recommend using it to ensure your oven is actually at 300°F (148°C). A too-hot oven can lead to a cake that rises too quickly and then collapses, while a cooler oven can mean an underbaked mess. Keeping an eye on the temperature will help you achieve that gorgeous rise and moist crumb!
Cooling is Key
Once your cakes are out of the oven, resist the urge to frost them immediately. Let them cool completely on wire racks. If you frost while they’re still warm, the frosting will melt and slide off, leading to a gooey disaster. Trust me, patience is a virtue here!
Frosting Consistency
For that dreamy frosting, aim for a spreadable yet firm consistency. If your frosting is too thick, add a splash of milk, and if it’s too thin, sprinkle in some more powdered sugar until you get it just right. You want it to hold its shape when you pipe it onto the cake, but still be easy to spread.
Following these tips will help you create a stunning Kahlua Coffee Chocolate Layer Cake that’s as delicious as it is beautiful! Happy baking, friends!
Variations on Kahlua Coffee Chocolate Layer Cake
One of the best things about the Kahlua Coffee Chocolate Layer Cake is how wonderfully versatile it is! You can easily tweak the ingredients and methods to create your own twist on this delicious dessert. Here are some fun variations to consider:
Different Frosting Flavors
If you want to change up the frosting, consider swapping out the coffee flavor for something fruity or nutty. A raspberry buttercream would add a refreshing zing, or you could try a hazelnut frosting for a rich, nutty flavor. Just be sure to adjust the sweetness as needed; you don’t want to overpower the cake’s chocolatey goodness!
Adding Flavor to the Cake Batter
Feel free to mix things up in the cake batter, too! Adding a teaspoon of almond extract can give the cake a warm, nutty aroma that complements the chocolate beautifully. For a minty twist, a few drops of peppermint extract can turn this cake into a festive treat for the holidays!
Incorporating Different Add-Ins
Want to add a little texture? Try folding in some chocolate chips or toasting nuts like walnuts or pecans into the batter. These little additions can give your cake a delightful crunch and enhance the overall flavor profile. Just be sure not to overload the batter; a cup of add-ins is usually just right!
Experimenting with Cake Layers
If you’re feeling adventurous, consider making a different layer altogether! A layer of rich cheesecake or a layer of whipped cream with fresh berries can add a new element to your cake. Just remember that if you add a heavier layer like cheesecake, you may need to adjust the baking time and cooling process.
Non-Alcoholic Version
If you’d prefer a non-alcoholic version, simply replace the Kahlua with an equal amount of strong brewed coffee or even a rich chocolate milk. You can also increase the espresso powder in the frosting to maintain that robust coffee flavor without the alcohol. Your cake will still be delicious and perfect for any gathering!
These variations allow you to personalize your Kahlua Coffee Chocolate Layer Cake while keeping that signature rich flavor intact. So don’t hesitate to get creative and make it your own! Happy baking!
Nutritional Information Disclaimer
Please note that nutritional information for the Kahlua Coffee Chocolate Layer Cake may vary based on the specific ingredients and brands used. The values provided are estimates and should be considered as a general guideline rather than precise measurements. Always check your ingredients for the most accurate information!
FAQ about Kahlua Coffee Chocolate Layer Cake
Q1. How should I store the Kahlua Coffee Chocolate Layer Cake?
To keep your cake fresh and delicious, store it in an airtight container at room temperature for up to 2–3 days. If you need to keep it longer, you can refrigerate it, but I recommend bringing it back to room temperature before serving for the best flavor and texture.
Q2. Can I make this cake non-alcoholic?
Absolutely! Just replace the Kahlua with an equal amount of strong brewed coffee or even chocolate milk for a rich flavor without the alcohol. You can also boost the espresso powder in the frosting to maintain that lovely coffee kick!
Q3. What is the best way to serve this cake?
This cake is perfect for any occasion! It pairs wonderfully with a scoop of vanilla ice cream or a dollop of whipped cream. You could also serve it alongside a cup of coffee to enhance those delicious flavors. It’s a fantastic dessert for birthdays, anniversaries, or even just a cozy night at home!
Q4. Can I freeze the Kahlua Coffee Chocolate Layer Cake?
Yes, you can! Just wrap the cake layers tightly in plastic wrap and then in aluminum foil before placing them in the freezer. They can be frozen for up to 3 months. When you’re ready to enjoy it, let the layers thaw in the fridge overnight and frost them once they’re completely cool.
Q5. How can I make the cake layers more chocolatey?
If you’re looking to amp up that chocolate flavor, consider adding some chocolate chips to the batter or increasing the amount of cocoa powder slightly. Just remember, if you add too much cocoa, you may need to adjust the other ingredients to keep the balance right. Happy baking!
Why You’ll Love This Recipe
- Irresistible Flavor: The combination of rich chocolate and robust coffee creates a flavor explosion that’s simply divine. Each bite is a perfect balance of sweetness and depth, making it hard to resist going back for seconds!
- Easy to Prepare: With straightforward steps and simple ingredients, this cake is approachable for bakers of all levels. You don’t need to be a pro to impress your friends and family!
- Stunning Presentation: This layered beauty looks as good as it tastes! The rich chocolate frosting and decorative sprinkles make it a showstopper at any gathering.
- Versatile for Any Occasion: Whether it’s a birthday party, holiday gathering, or just a cozy night in, this cake fits right in. It’s perfect for celebrations or as a special treat to share.
- Customizable: Feel free to experiment with flavors and textures. You can easily swap out the frosting or add mix-ins to make it uniquely yours!
Serving Suggestions for Kahlua Coffee Chocolate Layer Cake
Now that you’ve created this stunning Kahlua Coffee Chocolate Layer Cake, it’s time to think about how to serve it up and make it even more special! Here are some of my favorite ideas that will elevate your cake experience:
Perfect Pairings
- Freshly Brewed Coffee: Naturally, a slice of this cake goes perfectly with a cup of your favorite coffee. The rich chocolate and coffee flavors complement each other beautifully, creating a heavenly combination.
- Vanilla Ice Cream: The creaminess of vanilla ice cream provides a delightful contrast to the cake’s richness. It melts into the chocolate layers, adding a lovely touch of sweetness!
- Whipped Cream: A dollop of freshly whipped cream on top not only looks beautiful but adds a light, airy texture that balances the density of the cake.
Occasions to Serve
- Birthday Celebrations: This cake is a fantastic showstopper for any birthday party. Just imagine the smiles when you cut into those luscious layers!
- Holiday Gatherings: Whether it’s Christmas, Thanksgiving, or any festive occasion, this cake brings a touch of elegance to the dessert table and is sure to be a crowd favorite.
- Casual Get-Togethers: Hosting a cozy gathering with friends? This cake is perfect for sharing over good conversation and laughter!
- Afternoon Tea or Coffee Break: Enjoy a slice with friends during a leisurely afternoon tea or coffee break. It’s a sweet treat that will brighten anyone’s day!
For more recipes follow me in page Facebook and Pinterest.
Feel free to get creative with your presentation, too! A simple dusting of powdered sugar or some additional chocolate sprinkles on top can make your cake even more inviting. No matter how you choose to serve it, this Kahlua Coffee Chocolate Layer Cake is sure to impress and satisfy! Enjoy every delicious bite!
Print
Kahlua Coffee Chocolate Layer Cake: 5 Irresistibly Rich Tips
- Total Time: 1 hour 5 minutes
- Yield: 12 slices 1x
- Diet: Vegetarian
Description
Delicious Kahlua Coffee Chocolate Layer Cake with rich chocolate flavor and coffee frosting.
Ingredients
- 2 cups (260g) all-purpose flour
- 2 cups (414g) sugar
- 3/4 cup (85g) natural unsweetened cocoa powder
- 2 tsp baking soda
- 1 tsp salt
- 3 large eggs
- 3/4 cup (180ml) milk
- 1 cup (240ml) vegetable oil
- 1/2 cup (120ml) strong brewed coffee (replace Kahlua)
- 1 tsp vanilla extract
- 3/4 cup (180ml) hot coffee
- 3 tbsp instant espresso powder
- 1 1/2 cups (336g) unsalted butter, room temperature
- 1 1/4 cups (236g) shortening
- 10 1/4 cups (1208g) powdered sugar
- Chocolate jimmie sprinkles
Instructions
- Prepare three 8-inch cake pans with parchment circles in the bottom and grease the sides. Preheat oven to 300°F (148°C).
- Combine all dry ingredients in a large bowl.
- Add eggs, milk, vegetable oil, coffee, and vanilla extract to the dry ingredients and mix well.
- Add hot coffee and mix; batter will be thin.
- Divide batter evenly between cake pans and bake 32–35 minutes, or until a toothpick comes out with a few crumbs.
- Cool cakes 5 minutes in pans, then transfer to cooling racks to cool completely.
- For frosting: dissolve espresso powder in a small amount of hot water.
- Beat butter and shortening until smooth. Add half the powdered sugar and mix until smooth.
- Add half of the espresso mixture and mix. Add remaining powdered sugar and remaining espresso mixture until frosting reaches desired consistency.
- Level the cake layers by trimming the domes off the tops.
- Place first cake layer on serving plate, top with 1 cup frosting, spread evenly. Repeat with second layer and remaining frosting.
- Frost the outside of the cake smoothly. Optionally, use an icing comb to create a pattern on the sides.
- Press sprinkles into the bottom edges of the cake. Pipe swirls on top and add extra sprinkles.
- Store in an airtight container; best within 2–3 days.
Notes
- For a non-alcoholic version, replace Kahlua with strong brewed coffee or water and adjust espresso powder in frosting for desired coffee flavor.
- Prep Time: 30 minutes
- Cook Time: 35 minutes
- Category: Dessert
- Method: Baking
- Cuisine: American
Nutrition
- Serving Size: 1 slice
- Calories: 1089
- Sugar: 121 g
- Sodium: 528.9 mg
- Fat: 56.3 g
- Carbohydrates: 141.1 g
- Protein: 5.8 g
- Cholesterol: 94.1 mg
Keywords: Kahlua Coffee Chocolate Layer Cake, chocolate cake, coffee cake, dessert recipe