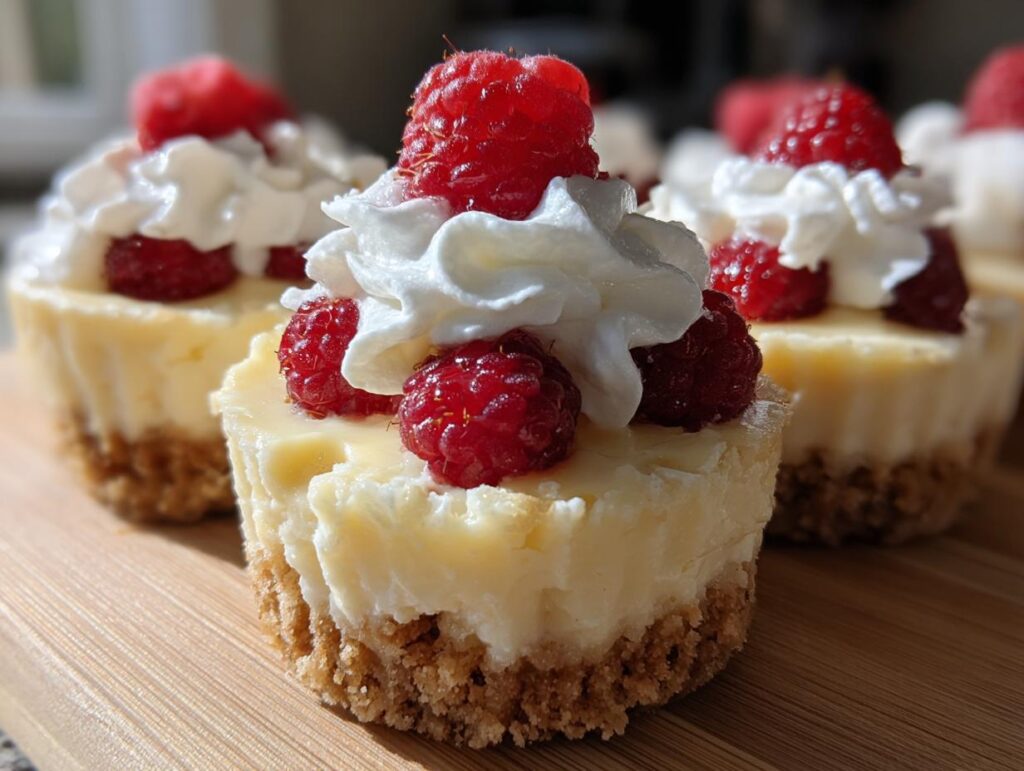
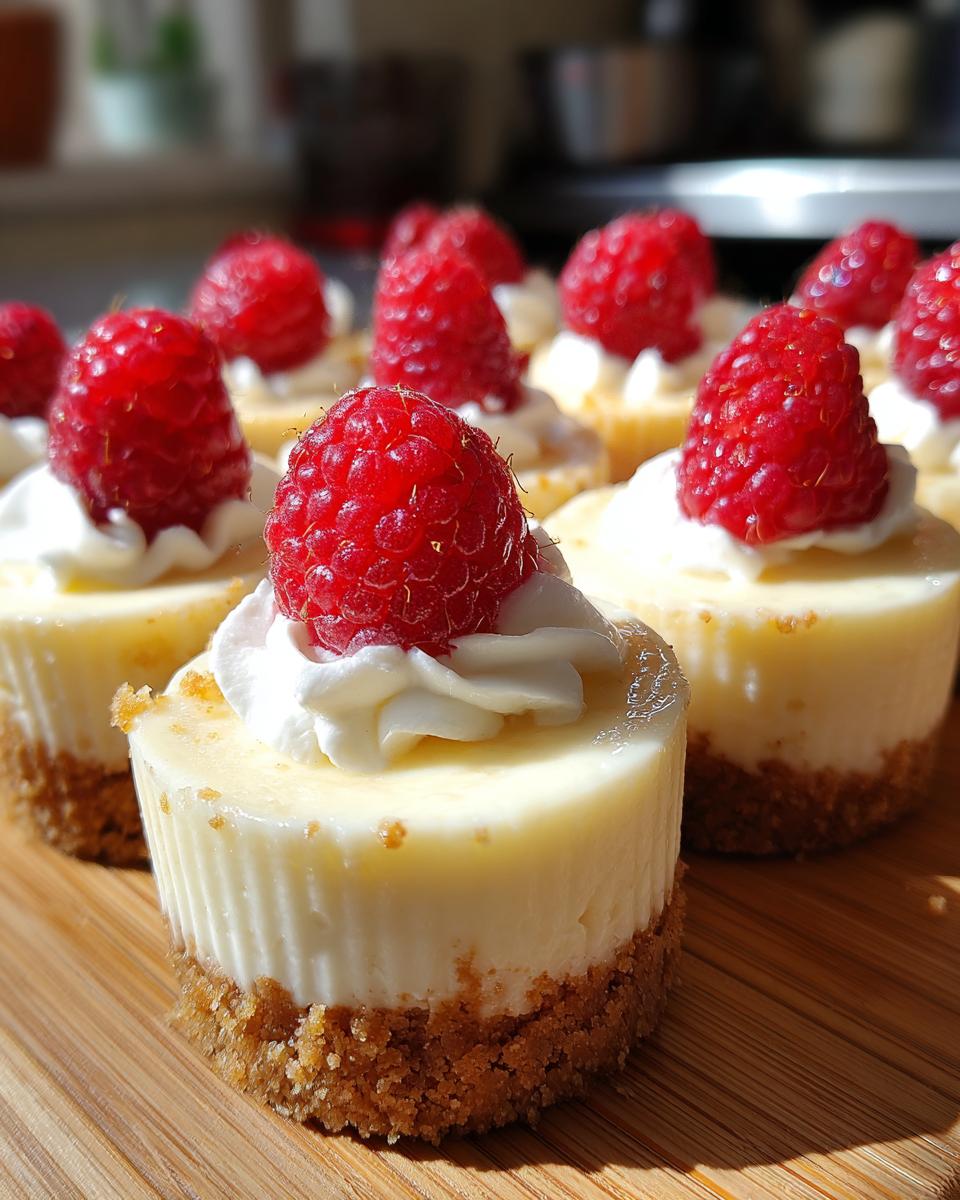
Let me tell you, No-Bake Cheesecake Cups are one of my absolute favorite desserts! I mean, who doesn’t love a creamy, dreamy cheesecake that you can whip up in no time, right? These delightful little cups are not only incredibly delicious, but they’re also super simple to make, which is a total win in my book. Whether it’s a last-minute gathering or a cozy evening at home, these cups bring a touch of sweetness that instantly elevates any occasion.
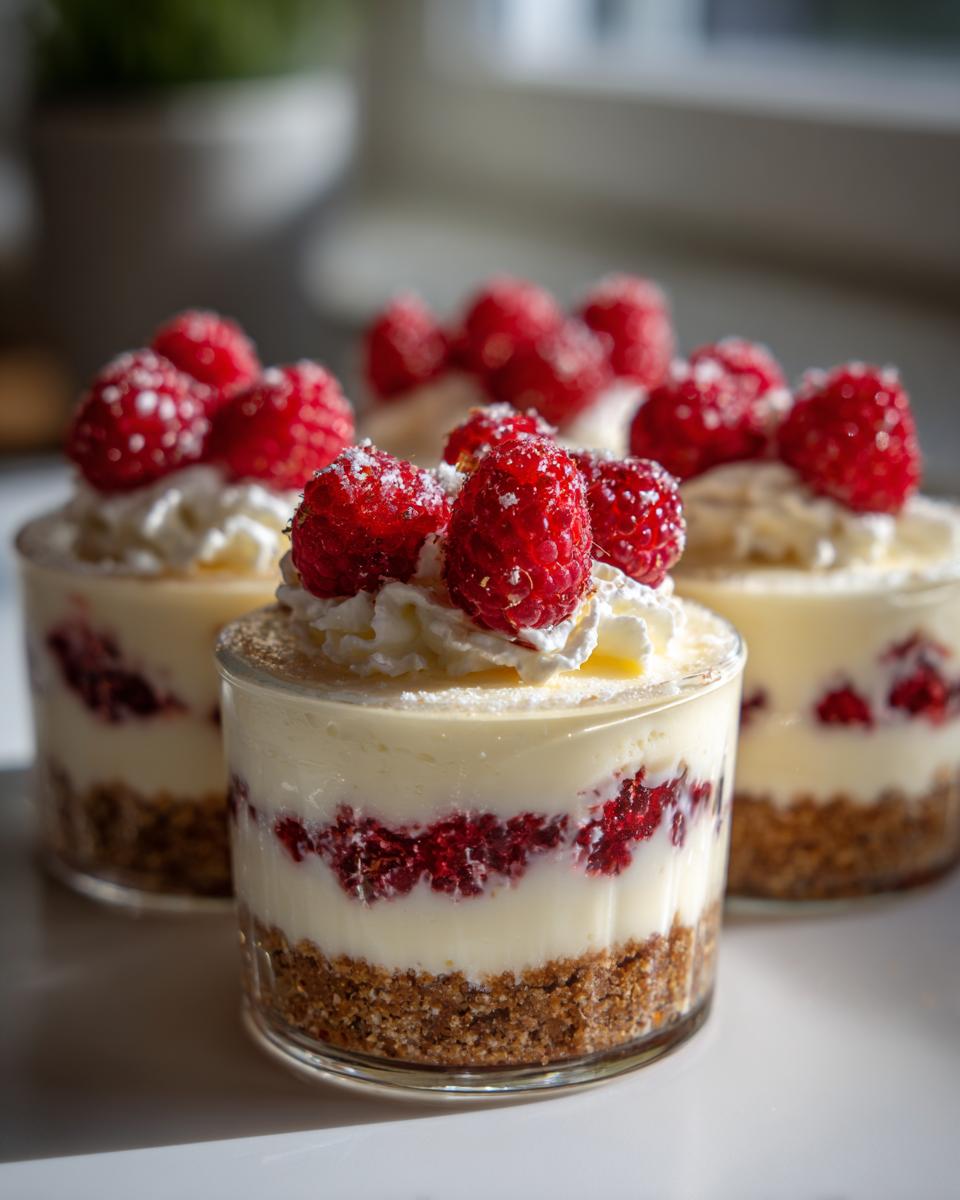
Picture this: a luscious cheesecake filling perfectly nestled atop a crunchy graham cracker base, just waiting for you to dive in. The best part? You don’t even need to turn on the oven! Just mix, chill, and enjoy. Trust me, once you take that first bite, you’ll be hooked. Plus, they’re so versatile! You can dress them up with your favorite toppings like fresh berries or whipped cream, making each cup feel extra special. So, if you’re looking for a dessert that’s both easy and impressive, No-Bake Cheesecake Cups are your answer!
Ingredients List
To create these scrumptious No-Bake Cheesecake Cups, you’ll need the following ingredients:
- 3/4 cup finely crushed graham cracker crumbs
- 2 tablespoons melted salted butter
- 8 ounces softened cream cheese
- 1/2 cup granulated sugar
- 1 teaspoon pure vanilla extract
- 1 cup heavy whipping cream
And don’t forget about the fun part! You can add optional toppings to make your cheesecake cups even more delightful. Think fresh raspberries, strawberries, whipped cream, or a sprinkle of additional graham cracker crumbs. The choice is yours, and it’s all about what makes your taste buds dance!
How to Prepare No-Bake Cheesecake Cups
Getting started on your No-Bake Cheesecake Cups is super easy, and I promise you’ll love every step of the process! Just follow these simple steps, and you’ll have a delightful dessert ready to impress your friends and family in no time.
Step-by-Step Instructions
First things first, let’s get that graham cracker crust ready. In a small bowl, combine 3/4 cup finely crushed graham cracker crumbs with 2 tablespoons melted salted butter. Stir them together until the crumbs are evenly coated with butter. This mixture should be slightly damp but still crumbly. Now, grab your serving glasses or dessert cups and scoop about 2-3 tablespoons of the crust mixture into the bottom of each cup. Gently press it down to form a nice, solid base.
Now, let’s move on to the cheesecake filling! In a large mixing bowl, pour in 1 cup heavy whipping cream. Beat it with an electric mixer on high speed until you get stiff peaks—this usually takes about 3-5 minutes. Just look for that perfect whipped cream texture that holds its shape! Once that’s done, transfer the whipped cream to another bowl and set it aside for now.
In the same bowl (no need to clean it!), add 8 ounces softened cream cheese, 1/2 cup granulated sugar, and 1 teaspoon pure vanilla extract. Mix these together on medium speed until it’s completely smooth and creamy, about 2 minutes. You want to ensure there are no lumps in your mixture—this is key for a silky cheesecake filling!
Now comes the fun part! Take the whipped cream you set aside and gently fold it into the cream cheese mixture. Use a spatula to lift and fold the whipped cream into the cream cheese, being careful not to deflate it. This folding technique is what keeps your filling light and airy, which is exactly what we want!
Once it’s all combined and looks oh-so-creamy, it’s time to fill the cups. You can either spoon the mixture directly into each cup or, for a fancy touch, use a piping bag to pipe the filling in. Either way, make sure each cup is filled generously. Now, for the final touch, if you’re using any optional toppings like fresh berries or whipped cream, go ahead and sprinkle them on top.
Cover the cups with plastic wrap and chill them in the refrigerator for at least an hour. This chilling time is crucial as it allows the flavors to meld and the filling to firm up a bit. Trust me, the wait will be worth it! After the chilling time is up, serve them cool and watch your loved ones enjoy every creamy bite!
Nutritional Information
These No-Bake Cheesecake Cups are not just a treat for your taste buds, but they also pack a punch in terms of flavor and nutrition. Here’s a quick glance at the estimated nutritional values per serving (1 cup):
- Calories: 350
- Fat: 25g
- Saturated Fat: 15g
- Trans Fat: 0g
- Cholesterol: 80mg
- Sodium: 210mg
- Carbohydrates: 30g
- Fiber: 1g
- Sugar: 15g
- Protein: 4g
Please note that these values are estimates based on typical ingredient usage and may vary depending on specific brands or variations you choose. Enjoying these delightful cups in moderation is key to savoring their rich flavors without worry!
Why You’ll Love This Recipe
- Quick Preparation: With just 20 minutes of hands-on time, you can whip up these No-Bake Cheesecake Cups in a flash!
- No Baking Required: Forget about preheating the oven! These cups come together effortlessly without any baking fuss.
- Creamy Texture: The combination of whipped cream and cream cheese creates a light and velvety filling that’s simply irresistible.
- Delicious Flavor: The classic cheesecake flavor shines through, making each bite a delightful experience that everyone will love.
- Customizable: Dress them up with your favorite toppings, from fresh fruit to decadent chocolate, making them perfect for any occasion.
Once you try these No-Bake Cheesecake Cups, I’m sure they’ll become a go-to dessert for gatherings, celebrations, or even a sweet treat just for you!
Tips for Success
To make your No-Bake Cheesecake Cups truly shine, I’ve got a few essential tips to share that will ensure you achieve the best results every time. First and foremost, make sure your cream cheese is fully softened before mixing. Cold cream cheese can lead to lumps in your filling, and nobody wants that! Leave it out at room temperature for about an hour before you start.
Also, when you’re whipping the cream, be sure to watch it closely. You want those stiff peaks, but over-whipping can turn it into butter—oops! So, stop mixing just when it starts to hold its shape.
And don’t skip the chilling time! Allowing the cheesecake cups to set in the refrigerator helps the flavors meld beautifully and gives the filling a nice, firm texture. Trust me, it’s worth the wait. Follow these tips, and you’ll have a dessert that impresses every single time!
Variations for No-Bake Cheesecake Cups
One of the best things about No-Bake Cheesecake Cups is how adaptable they are! You can easily switch things up to suit your mood or the occasion. For a chocolate lover’s dream, try adding 1/2 cup of melted chocolate to the cream cheese mixture for a rich and indulgent flavor. If you’re a fruit fan, consider swirling in fruit purees like raspberry or strawberry for a burst of freshness. Just fold it in gently after mixing your cream cheese!
If you want to change the crust, crushed cookies like Oreos or gingersnaps make fantastic alternatives to graham crackers. You can even experiment with flavored extracts—a splash of almond or lemon extract can add a delightful twist. The possibilities are endless, so feel free to get creative and make these cheesecake cups your own!
Serving Suggestions
When it comes to serving your No-Bake Cheesecake Cups, the options are as delightful as the dessert itself! I love pairing these creamy cups with a steaming cup of coffee or a fragrant herbal tea for a cozy afternoon treat. They also shine at celebrations—think birthday parties, potlucks, or even a simple family dinner. For a touch of elegance, try serving them alongside a glass of sparkling wine or a refreshing lemonade during summer gatherings.
Don’t forget to set out some extra toppings on the side, like fresh fruit or whipped cream, so guests can customize their cups! Trust me, they’ll appreciate the little extra touch!
Storage & Reheating Instructions
Storing your No-Bake Cheesecake Cups is super simple! Just cover them with plastic wrap or a lid to keep them fresh in the refrigerator. They’ll stay delicious for up to 3 days—if they last that long! The flavors actually get better as they sit, so don’t worry if you have leftovers.
One of the best things about these cheesecake cups is that they’re served cold and don’t require any reheating. Just grab them from the fridge, add your favorite toppings, and enjoy! Perfect for a quick dessert anytime!
For more recipes follow me in page Pinterest.
Print
No-Bake Cheesecake Cups: 5 Simple Steps to Dreamy Bliss
- Total Time: 1 hour 20 minutes
- Yield: 4 servings 1x
- Diet: Vegetarian
Description
No-Bake Cheesecake Cups are a simple and delicious dessert that combines creamy cheesecake filling with a crunchy graham cracker base.
Ingredients
- 3/4 cup graham cracker crumbs
- 2 tbsp salted butter, melted
- 8 oz cream cheese, softened
- 1/2 cup granulated sugar
- 1 teaspoon pure vanilla extract
- 1 cup heavy whipping cream
- Optional toppings: raspberries, strawberries, whipped cream, broken cookies, graham cracker crumbs
Instructions
- In a small bowl, stir together the melted butter and graham cracker crumbs until evenly distributed.
- Put 2-3 tablespoons of the mixture into the bottom of each glass or serving dish.
- In a large bowl, pour the whipped cream in and beat on high until stiff peaks form.
- Scrape the whipped cream into a second bowl, then combine the cream cheese, sugar, and vanilla and mix until smooth.
- Gently fold the whipped cream into the cream cheese mixture until creamy.
- Spoon the mixture into a piping bag or divide it evenly among the cups.
- Top with fresh fruit if desired, cover, and chill for at least an hour before serving.
Notes
- Use any fruit or topping you prefer.
- Chilling helps the flavors to meld.
- Prep Time: 20 minutes
- Cook Time: 0 minutes
- Category: Dessert
- Method: No-Bake
- Cuisine: American
Nutrition
- Serving Size: 1 cup
- Calories: 350
- Sugar: 15g
- Sodium: 210mg
- Fat: 25g
- Saturated Fat: 15g
- Unsaturated Fat: 8g
- Trans Fat: 0g
- Carbohydrates: 30g
- Fiber: 1g
- Protein: 4g
- Cholesterol: 80mg
Keywords: No-Bake Cheesecake Cups, Cheesecake, Dessert, Easy Recipes