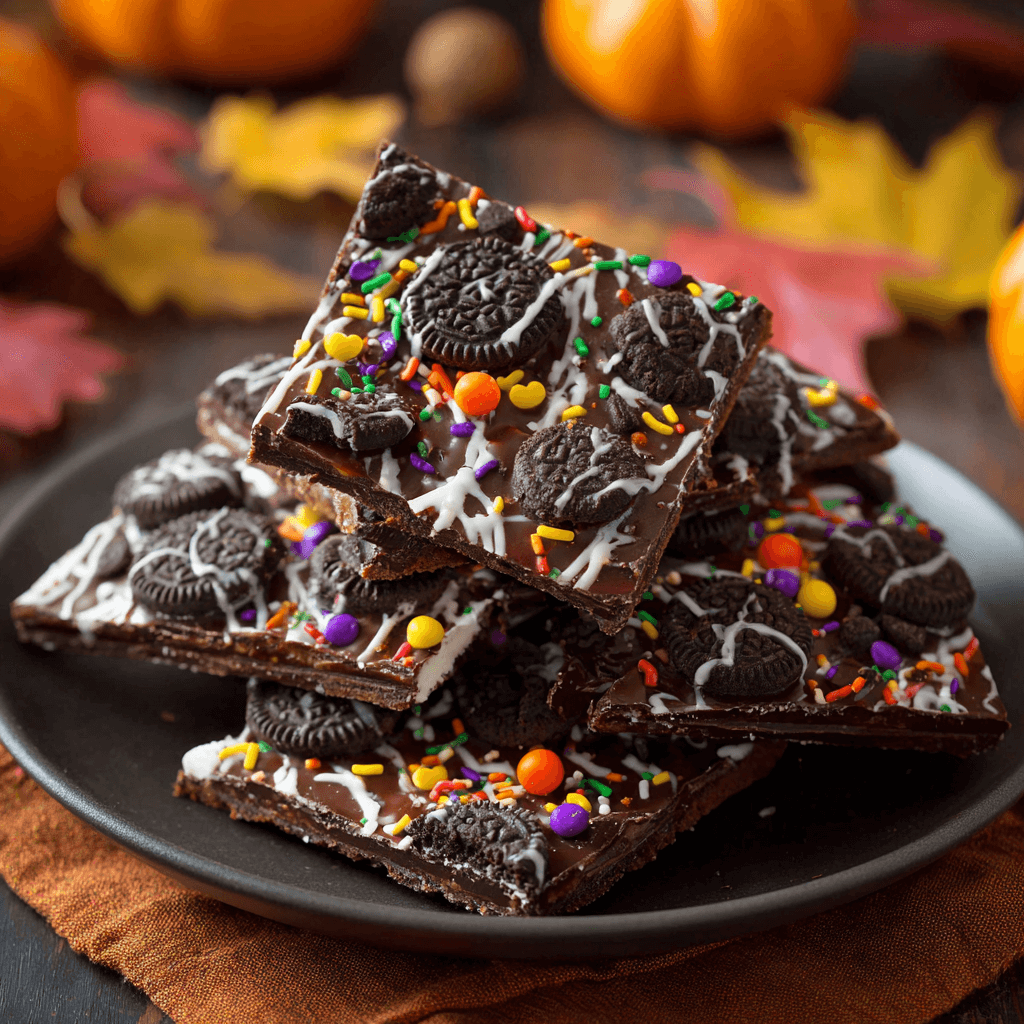
As the leaves turn and the air gets crisp, I can’t help but get excited about Halloween! This Spooky Halloween Oreo Bark is the perfect treat to whip up when you’re short on time but still want to impress your family and friends. It’s a delightful combination of chocolate and Oreos that’s sure to please both kids and adults alike. Plus, it’s a no-bake recipe, making it a quick solution for busy days filled with Halloween festivities. Trust me, this treat will have everyone coming back for more!
Spooky Halloween Oreo Bark: A Fun, Easy Treat!
- Total Time: 1 hour 20 minutes
- Yield: 12 servings 1x
- Diet: Vegetarian
Description
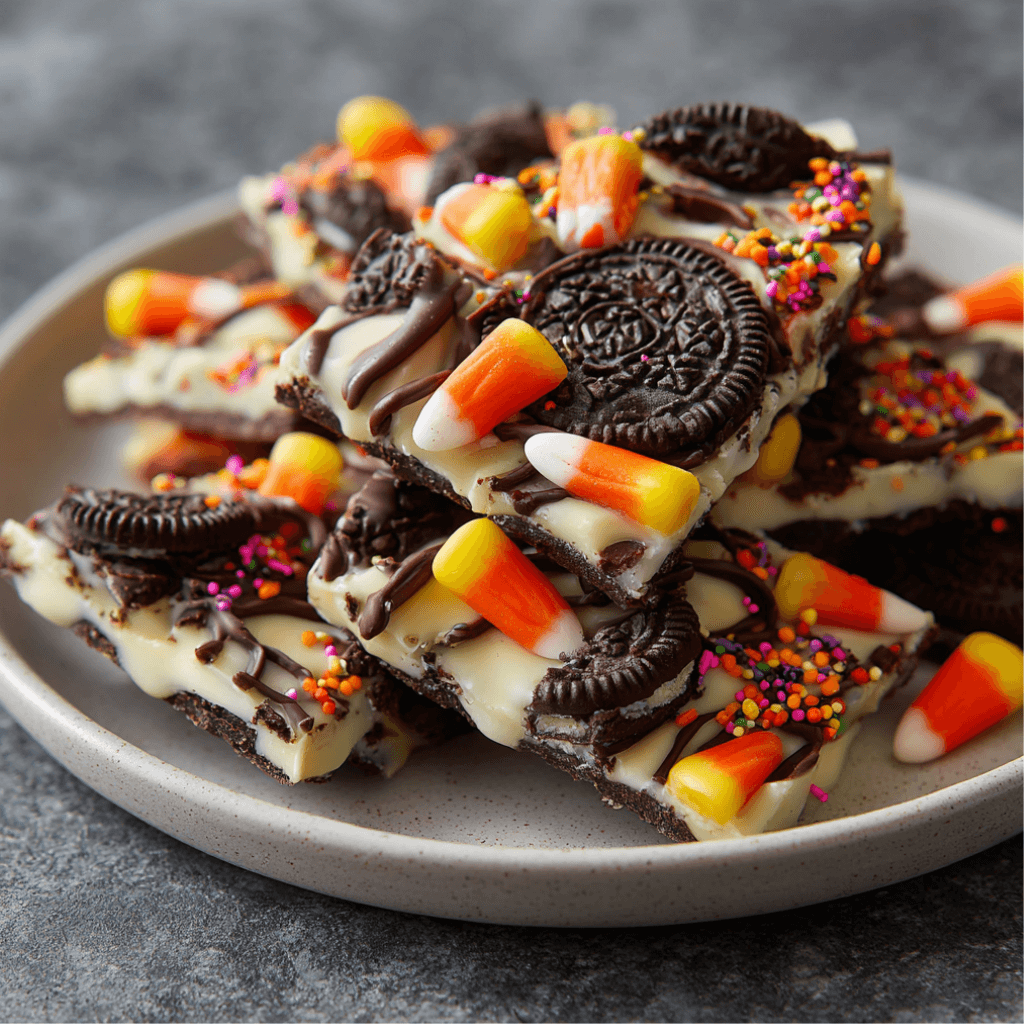
Spooky Halloween Oreo Bark is a fun and easy treat perfect for Halloween celebrations. This delicious dessert combines chocolate and Oreos, making it a crowd-pleaser for kids and adults alike.
Ingredients
- 1 package of Oreo cookies
- 2 cups of white chocolate chips
- 1 cup of milk chocolate chips
- 1 cup of Halloween-themed sprinkles
- 1/2 cup of candy corn
Instructions
- Line a baking sheet with parchment paper.
- Melt the white chocolate chips in a microwave-safe bowl, stirring every 30 seconds until smooth.
- Pour the melted white chocolate over the lined baking sheet and spread it evenly.
- Crush the Oreo cookies and sprinkle them over the white chocolate layer.
- Melt the milk chocolate chips and drizzle them over the top.
- Add Halloween-themed sprinkles and candy corn on top for decoration.
- Refrigerate for at least 1 hour or until set.
- Once set, break into pieces and serve.
Notes
- Store in an airtight container for up to a week.
- Feel free to customize with your favorite Halloween candies.
- Make sure the chocolate is fully melted to avoid clumps.
- Prep Time: 15 minutes
- Cook Time: 5 minutes
- Category: Dessert
- Method: No-Bake
- Cuisine: American
Nutrition
- Serving Size: 1 piece
- Calories: 150
- Sugar: 12g
- Sodium: 50mg
- Fat: 8g
- Saturated Fat: 4g
- Unsaturated Fat: 2g
- Trans Fat: 0g
- Carbohydrates: 18g
- Fiber: 1g
- Protein: 2g
- Cholesterol: 5mg
Keywords: Halloween, Oreo, Bark, Dessert, Treat
Table of Contents
Why You’ll Love This Spooky Halloween Oreo Bark
This Spooky Halloween Oreo Bark is a game-changer for busy moms like me! It’s incredibly easy to make, taking just 15 minutes of prep time. The delightful blend of creamy white chocolate and crunchy Oreos creates a taste sensation that’s hard to resist. Plus, it’s a fun activity to do with the kids, making it a perfect way to bond while creating a festive treat. Who doesn’t love a little chocolate magic during Halloween?
Ingredients for Spooky Halloween Oreo Bark
Gathering the right ingredients is half the fun! Here’s what you’ll need to create this delightful Spooky Halloween Oreo Bark:
- Oreo cookies: The star of the show! Their crunchy texture and rich flavor add a delicious twist to the bark.
- White chocolate chips: These melt beautifully and provide a sweet, creamy base for your bark. You can also use white chocolate bars if you prefer.
- Milk chocolate chips: For that classic chocolatey drizzle on top, milk chocolate adds a nice contrast to the sweetness of the white chocolate.
- Halloween-themed sprinkles: These add a festive touch! Feel free to get creative with colors and shapes to make your bark extra spooky.
- Candy corn: A Halloween favorite! Their sweet, chewy texture complements the chocolate perfectly. You can swap them out for other candies if you like.
Don’t forget, the exact quantities for each ingredient are listed at the bottom of the article for easy printing. Now, let’s get ready to create some Halloween magic!
How to Make Spooky Halloween Oreo Bark
Now that we have our ingredients ready, let’s dive into the fun part—making this Spooky Halloween Oreo Bark! Follow these simple steps, and you’ll have a delicious treat in no time.
Step 1: Prepare Your Baking Sheet
Start by lining a baking sheet with parchment paper. This makes for easy removal and cleanup later. Just cut a piece of parchment to fit the sheet, and press it down so it sticks. It’s like giving your bark a cozy bed to rest on!
Step 2: Melt the White Chocolate
Next, grab a microwave-safe bowl and add your white chocolate chips. Microwave them in 30-second intervals, stirring in between. This helps prevent clumps and ensures a smooth melt. Keep an eye on it; you want it silky, not scorched!
Step 3: Spread the White Chocolate
Once your white chocolate is melted and smooth, pour it over the lined baking sheet. Use a spatula to spread it evenly, creating a nice, thick layer. This will be the base of your spooky creation, so make it as even as possible!
Step 4: Add Crushed Oreos
Now, it’s time to crush those Oreo cookies! You can place them in a zip-top bag and smash them with a rolling pin or your hands. Sprinkle the crushed Oreos generously over the white chocolate layer. This adds that delightful crunch we all love!
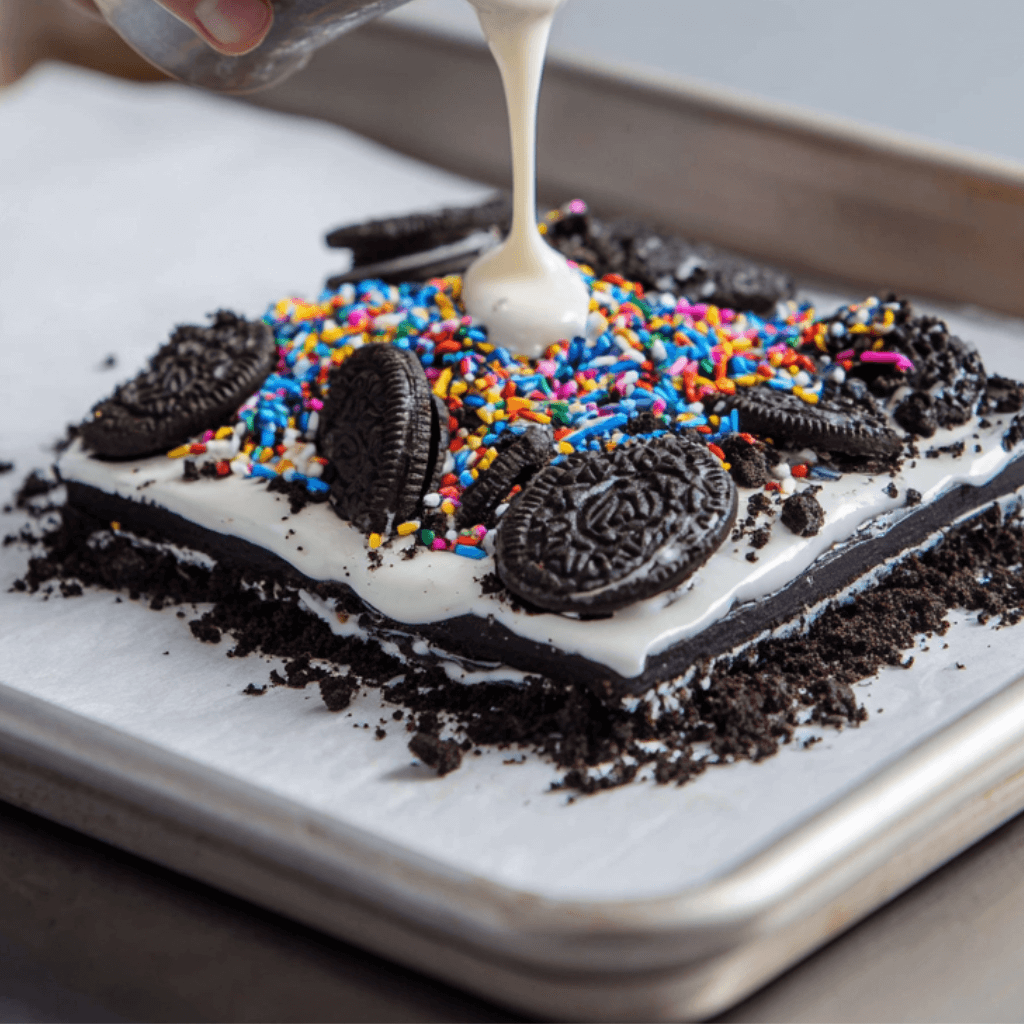
Step 5: Drizzle Milk Chocolate
In a separate bowl, melt your milk chocolate chips using the same microwave method. Once melted, drizzle the milk chocolate over the top of the Oreo layer. This creates a beautiful contrast and adds a rich flavor that’s simply irresistible!
Step 6: Decorate with Sprinkles and Candy Corn
Now comes the fun part—decorating! Sprinkle your Halloween-themed sprinkles and candy corn over the top. Get creative! This is your chance to make it as spooky or festive as you like. The more, the merrier!
Step 7: Refrigerate to Set
Place your baking sheet in the refrigerator for at least 1 hour. This step is crucial! It allows the chocolate to set properly, making it easier to break into pieces later. Patience is key here, but I promise it’s worth the wait!
Step 8: Break and Serve
Once your bark is set, take it out of the fridge. Break it into pieces using your hands or a knife. Serve it on a festive platter, and watch your family and friends enjoy this delightful treat. It’s the perfect way to celebrate Halloween!
Tips for Success
- Make sure your chocolate is fully melted to avoid clumps.
- Use a sturdy baking sheet to prevent bending while spreading the chocolate.
- Feel free to customize with your favorite Halloween candies for a personal touch.
- Keep the bark in an airtight container to maintain freshness.
- For a fun twist, try adding a sprinkle of sea salt on top before refrigerating!
Equipment Needed
- Baking sheet: A standard size works well, but you can use a larger one if needed.
- Parchment paper: Wax paper is a good alternative if you don’t have parchment.
- Microwave-safe bowl: Any heatproof bowl will do, even a glass mixing bowl.
- Spatula: A rubber spatula is great for spreading, but a spoon works too.
- Zip-top bag: Perfect for crushing Oreos; a bowl and rolling pin can also work.
Variations
- Dark Chocolate Delight: Swap the white chocolate for dark chocolate for a richer flavor that pairs beautifully with Oreos.
- Nutty Twist: Add chopped nuts like almonds or pecans for an extra crunch and a nutty flavor.
- Gluten-Free Option: Use gluten-free Oreo cookies to make this treat suitable for those with gluten sensitivities.
- Vegan Version: Choose dairy-free chocolate chips and vegan Oreos for a plant-based treat everyone can enjoy.
- Fruit Infusion: Incorporate dried fruits like cranberries or raisins for a chewy texture and a pop of color.
Serving Suggestions
- Pair your Spooky Halloween Oreo Bark with a warm cup of apple cider for a cozy treat.
- Serve it alongside a platter of fresh fruit for a colorful contrast.
- Present the bark on a spooky-themed platter to enhance the Halloween vibe.
- Wrap pieces in clear bags tied with orange ribbons for a fun party favor.
For more recipes follow me in page Facebook and Pinterest
FAQs about Spooky Halloween Oreo Bark
Can I use different types of chocolate for this recipe?
Absolutely! You can mix and match your favorite chocolates. Dark chocolate or even milk chocolate can be used instead of white chocolate for a different flavor profile. Just remember, the key is to melt them carefully to avoid burning!
How long can I store the Spooky Halloween Oreo Bark?
This treat can be stored in an airtight container for up to a week. Just make sure to keep it in a cool, dry place to maintain its freshness. You might want to hide it from the kids, though; it disappears quickly!
Can I make this recipe ahead of time?
Yes! This Spooky Halloween Oreo Bark is perfect for making ahead of time. You can prepare it a few days in advance and store it until you’re ready to serve. It’s a great way to save time during the busy Halloween season!
What can I substitute for candy corn?
If candy corn isn’t your thing, feel free to swap it out for other Halloween candies like M&M’s, gummy worms, or even chocolate-covered pretzels. The goal is to have fun and make it your own!
Is this recipe suitable for kids to help with?
Definitely! This recipe is a fantastic way to get the kids involved in the kitchen. They can help with crushing the Oreos, decorating with sprinkles, and even breaking the bark into pieces. It’s a fun family activity!
Final Thoughts
Creating this Spooky Halloween Oreo Bark is more than just making a treat; it’s about sharing joy and laughter with loved ones. The delightful combination of chocolate and Oreos brings back sweet memories of Halloween fun. As you gather around to enjoy this festive bark, you’ll find smiles all around. It’s a simple yet magical way to celebrate the season, making it a cherished tradition in your home. So, roll up your sleeves, get the kids involved, and let the Halloween spirit shine through your kitchen. Trust me, this treat will become a favorite for years to come!